Where were you when we were getting Pi? |
Pi Blog
Linux LFS101 - brush up your Pi knowledge
If, like me, you've developed your knowledge of Linux in a rather piecemeal and ad hoc way, a brush-up on your skills might be a good idea. At the very least there might be gaps in your knowledge and, furthermore, some tasks that you are labouring over might actually be easier than you think.
I've just completed the Linux Foundation's LFS101x.2: Introduction to Linux course. It's on-line, free and very flexible. The tuition takes you form the basics of Linux – bootloading, kernels, distributions filesystems, shells, editors – right up to common applications and GUIs. There was a lot of stuff in there that I'd got away without knowing so far, but I'm glad I've learnt it.
 My top tip is to learn how to use the vi editor. You can used from the command line in a non-GUI environment – a bonus when you a re ssh'ing around for example – and it is just so quick to use when you are dealing with things like config files, or even code.
There's an 'honor code' exam at the end. And you can pay to have an 'id-verified' exam too. Here's my certificate on the left.
I spent around 20 hours on the 18-unit course. It's worth not skimping on the 'Labs' at the end of each section. Here you can try out your knowledge. It helps if you have a Linux system where you have root access – either a Pi or something running under VMWare works a treat. I even had a go at CentOS (Red Hat) using VWWare on Windows. You can sign up here www.edx.org/course/introduction-linux-linuxfoundationx-lfs101x-2 |
Close to done...
 In the last couple of weeks I have:
  |
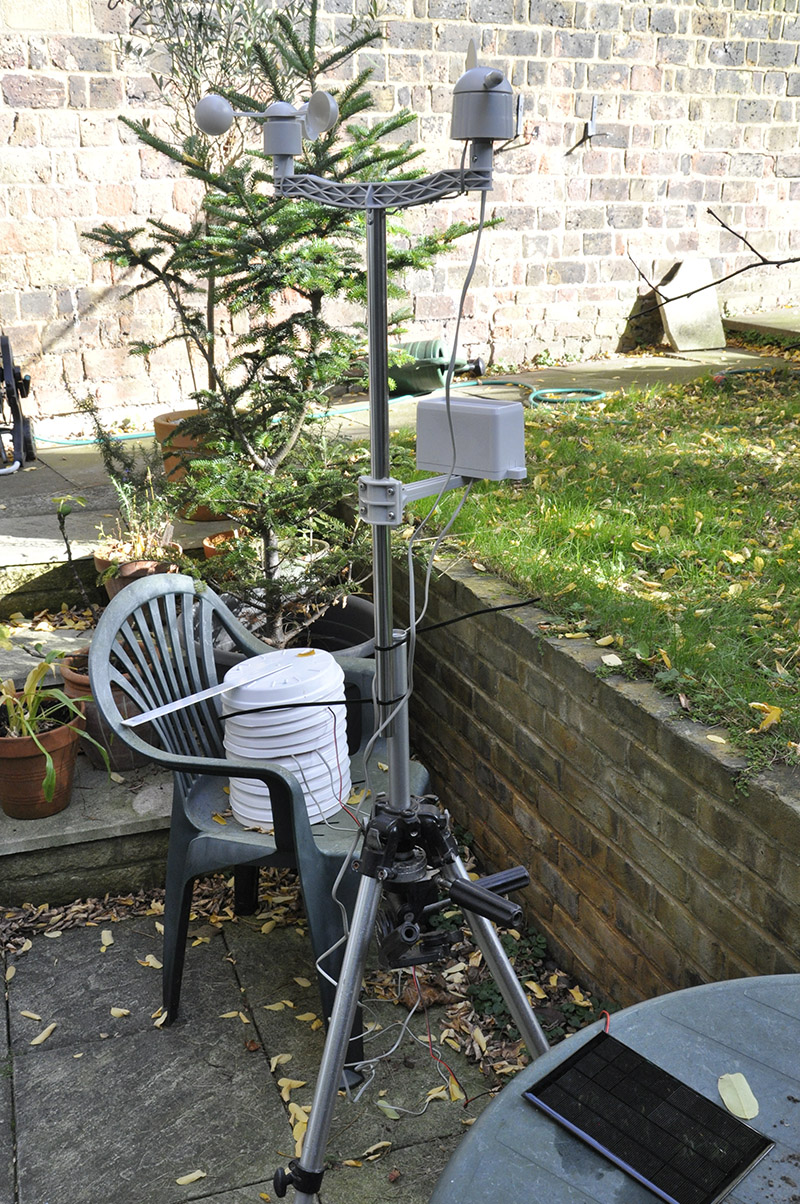
Close to a functional prototype
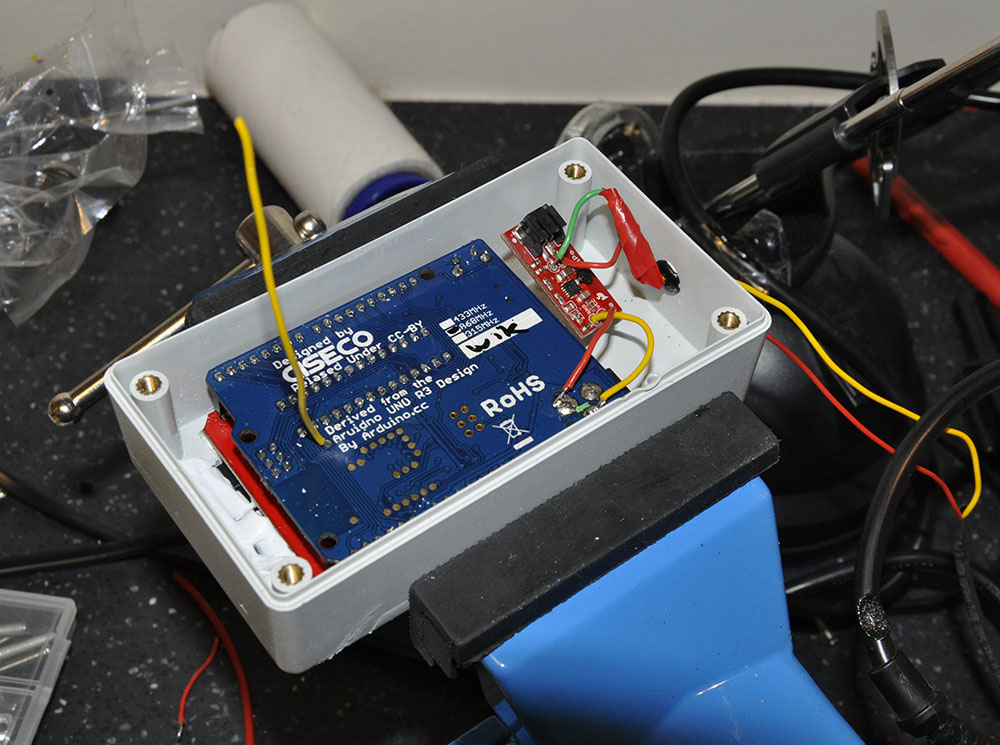
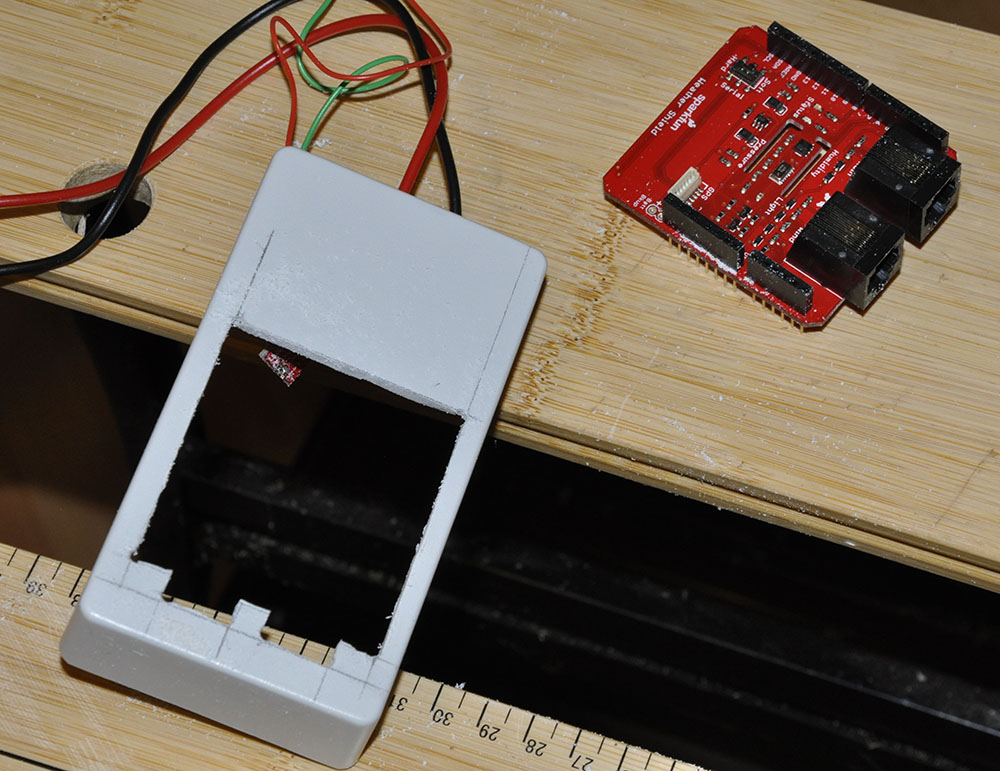
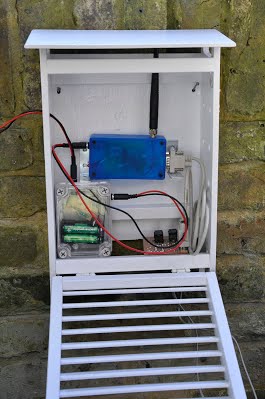 This is a far cheaper and simpler setup than the first prototype. The RFu328 draws just over 30 milliamps (about a third of the original XinoXF) which makes the solar power setup easier. I've also split off the sensors from the Arduino. The original XinoXF and SparkFun Weathershield version left the XinoXF (that's an Arduino clone with a built in transmitter by the way) far too exposed. To facilitate that split, I made a sensor board out of a spare piece of Veroboard, some SparkFun sensors (BMP180 for pressure and HTU21D for humidity and temperature) and RJ11 sockets for my rain/wind sensors plug into. By the way the SparkFun stuff is available in the UK from the admirable ProtoPic. To hook the sensors to the RFu328 I used a old-style RS232 serial cable so I had a pluggable, modular solution. The eventual end-game will be to produce a proper PCB for the sensors and RJ11 sockets. Meanwhile the inside of the Stevenson screen (right) looks moderately tidy! Along the way I have had to do a bit of recoding on the Arduino end and even learned how to make and calibrate a voltage splitter to measure the wind direction. Next steps
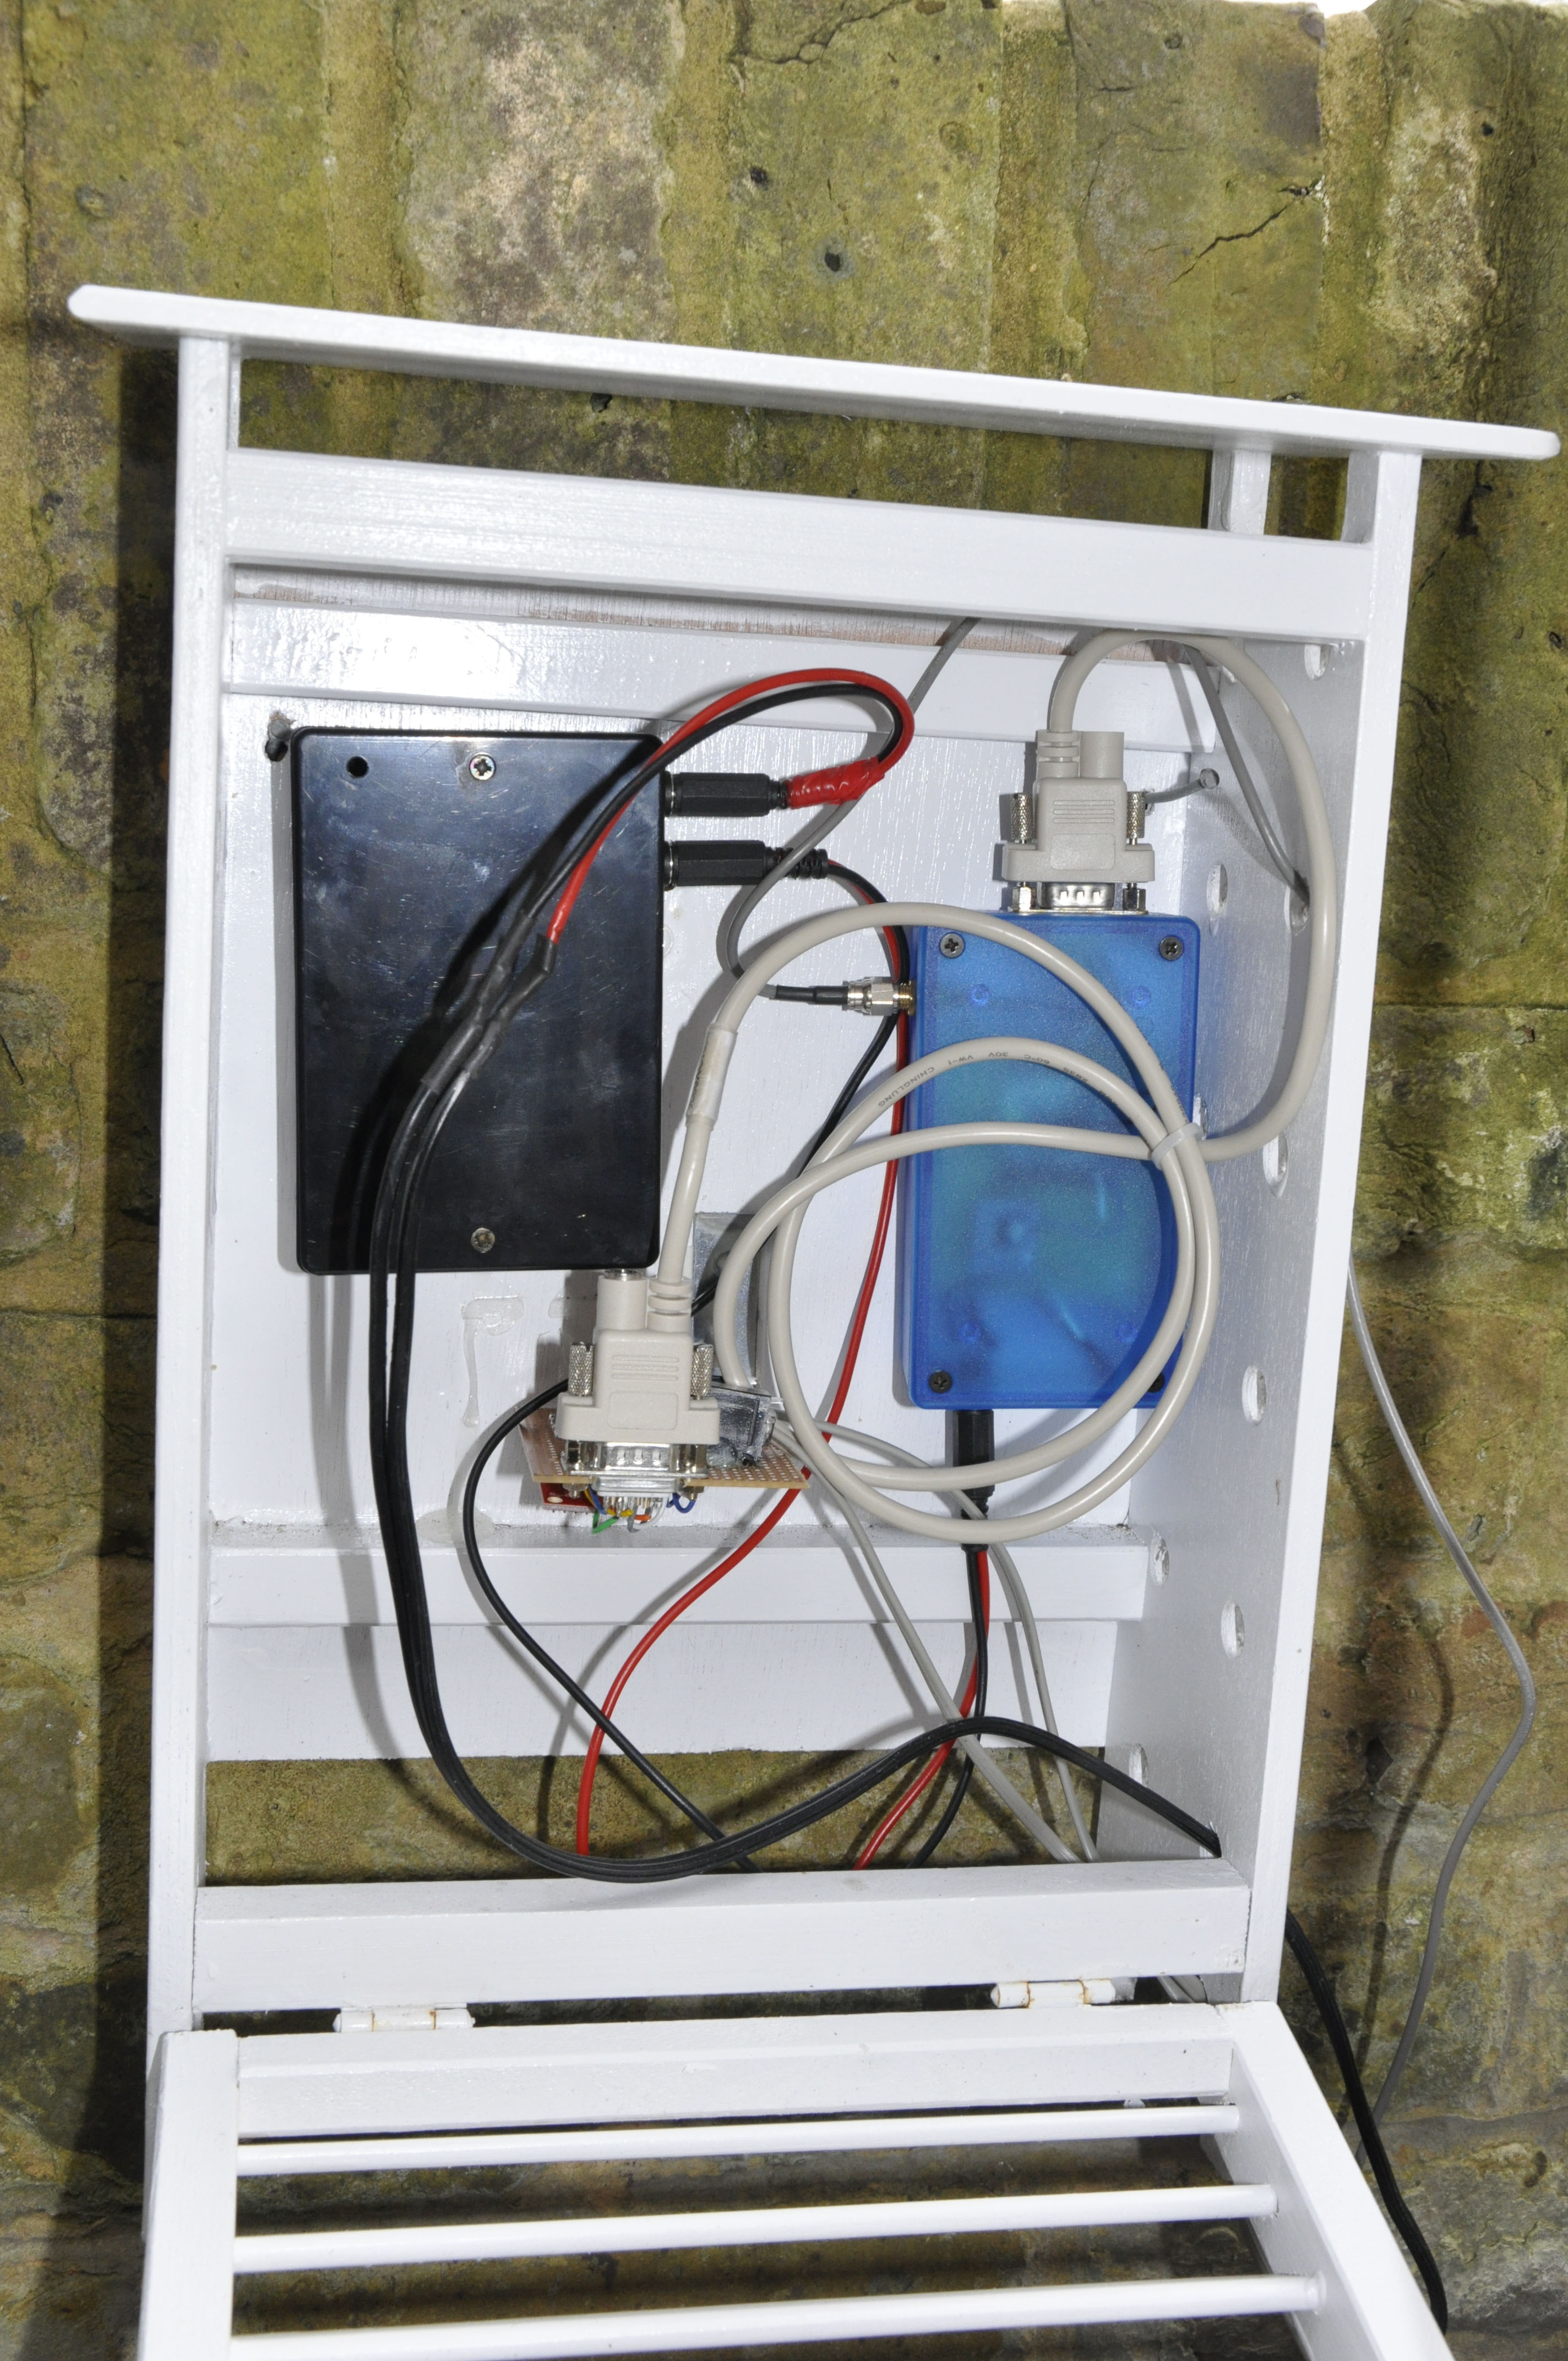
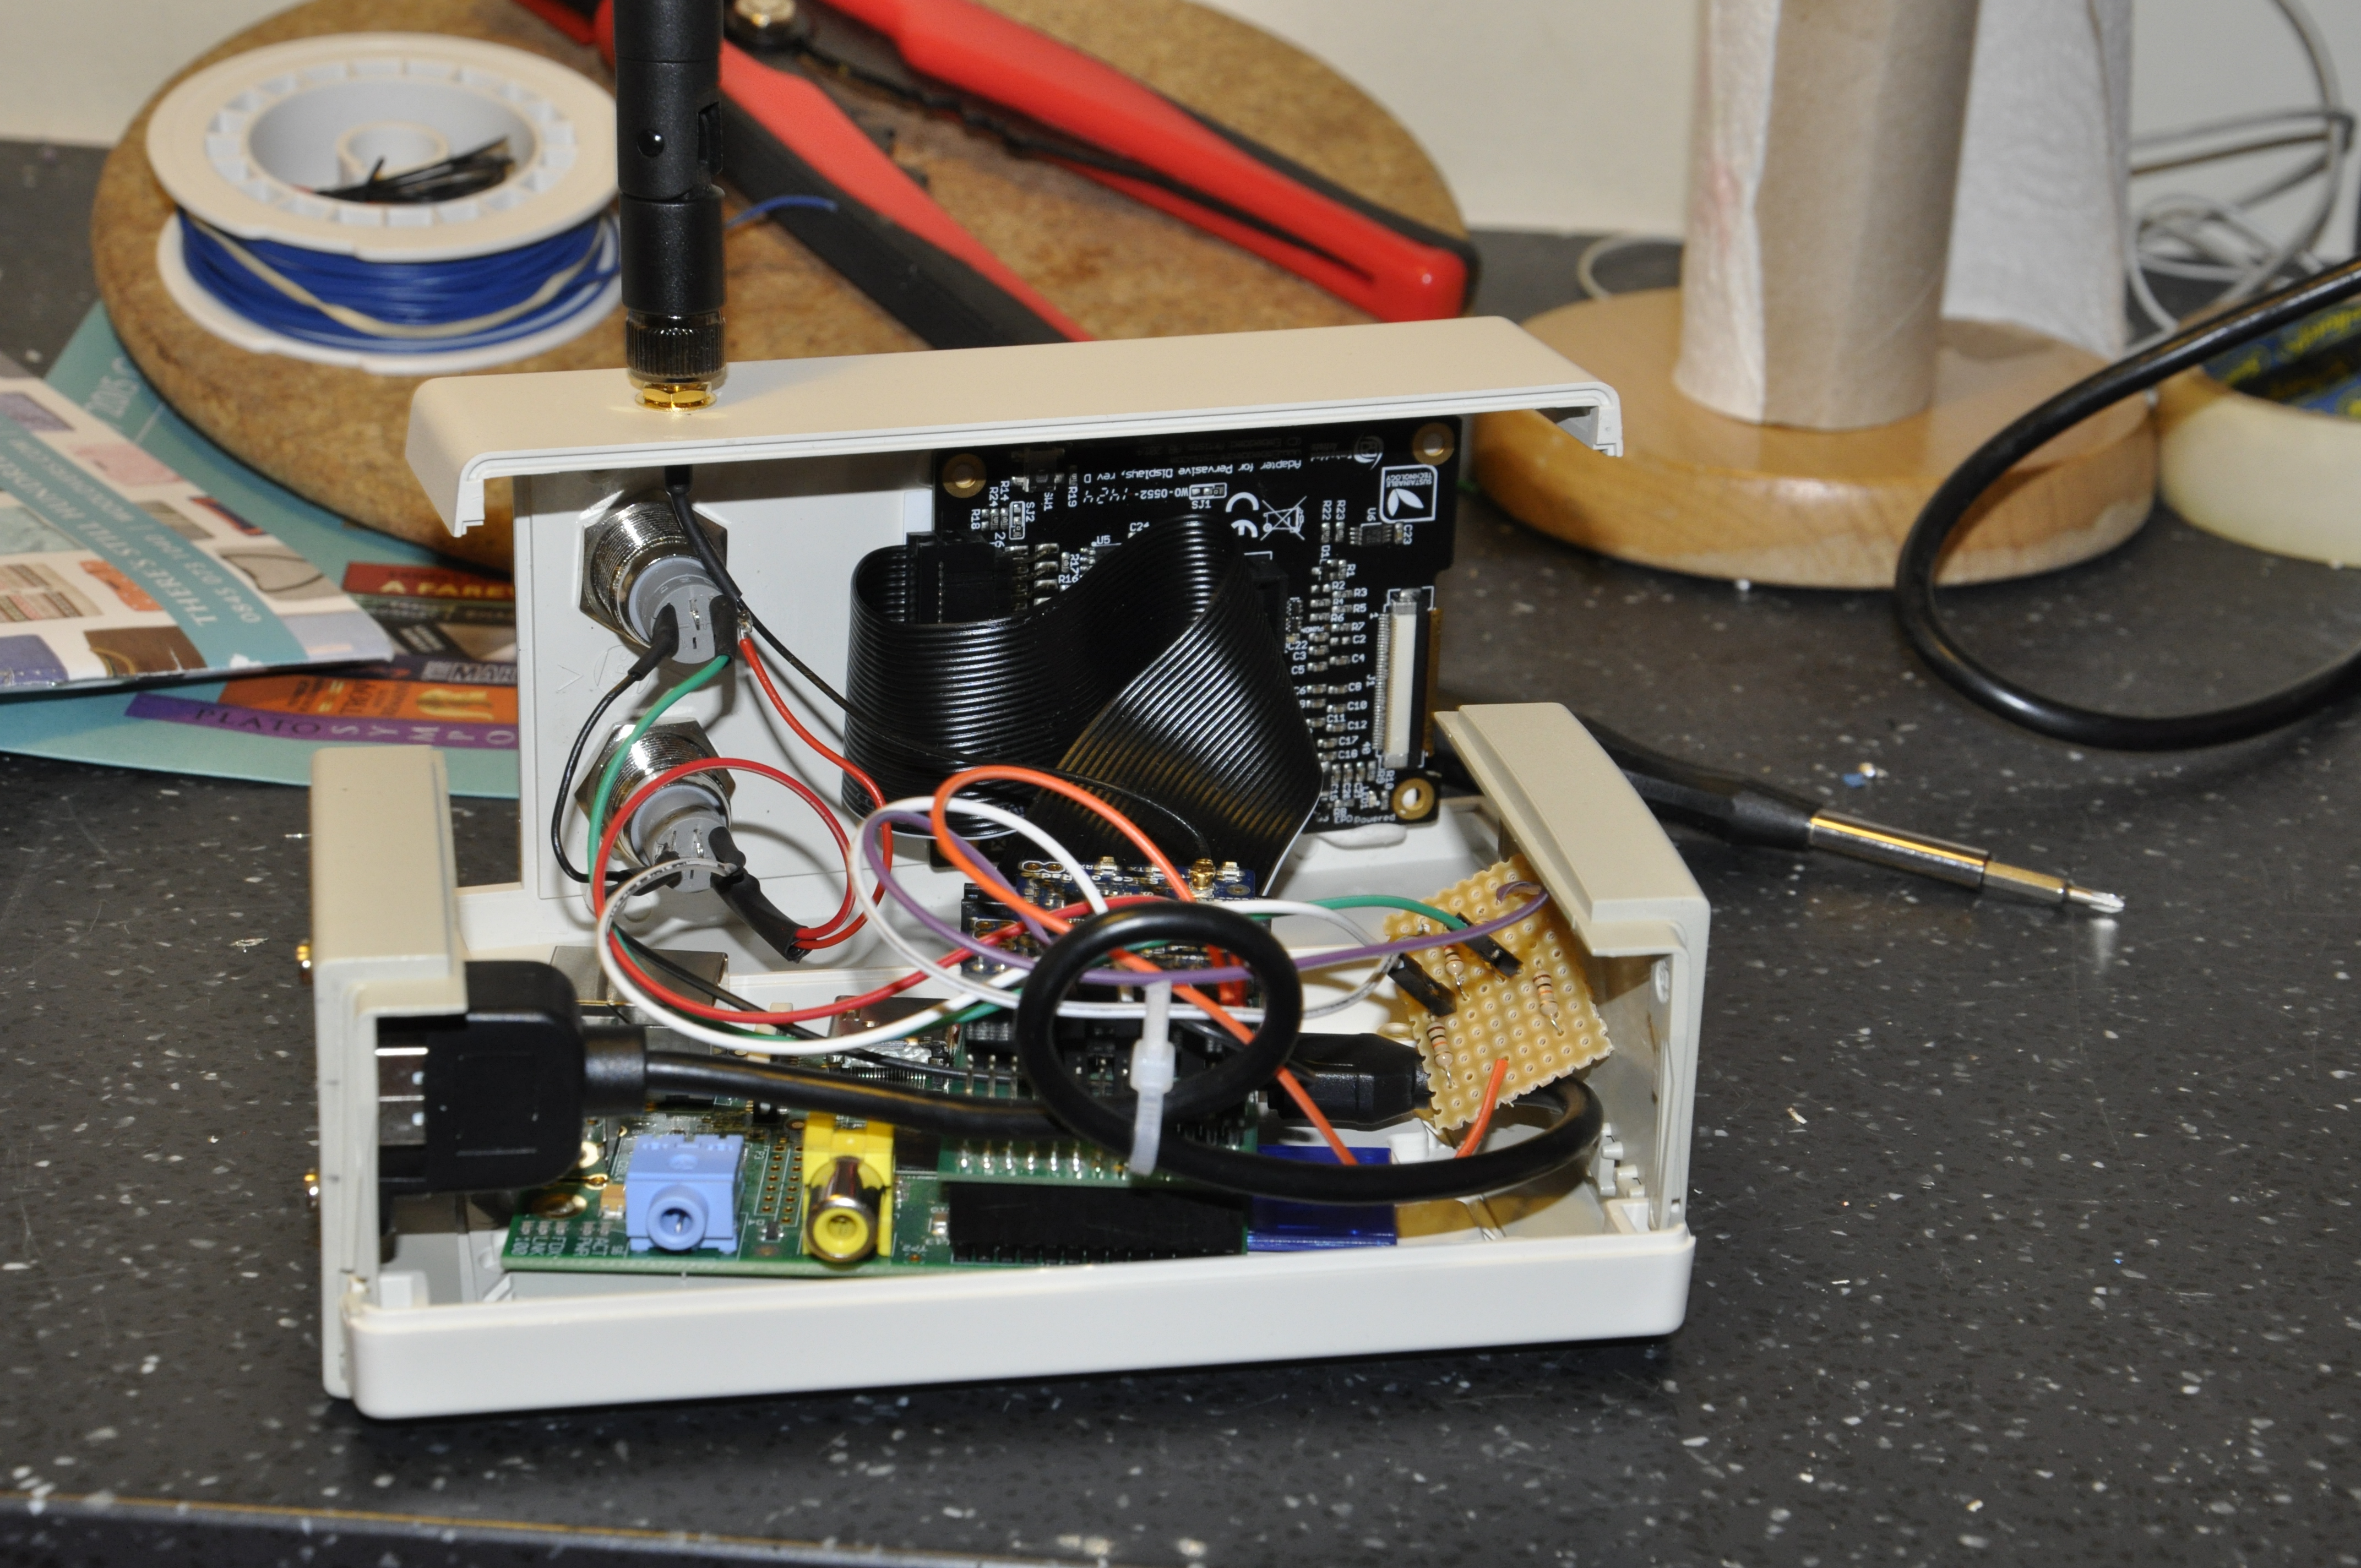
The photos below show the inside of the transmitter with the RFu328 at its heart. Next are two pics of the sensor board showing the RS232 cable connected. Finally there is the box holding the AA batteries and the LM317T charge controller. The solar panel plugs in the left side, the cable to the transmitter plugs into the top.  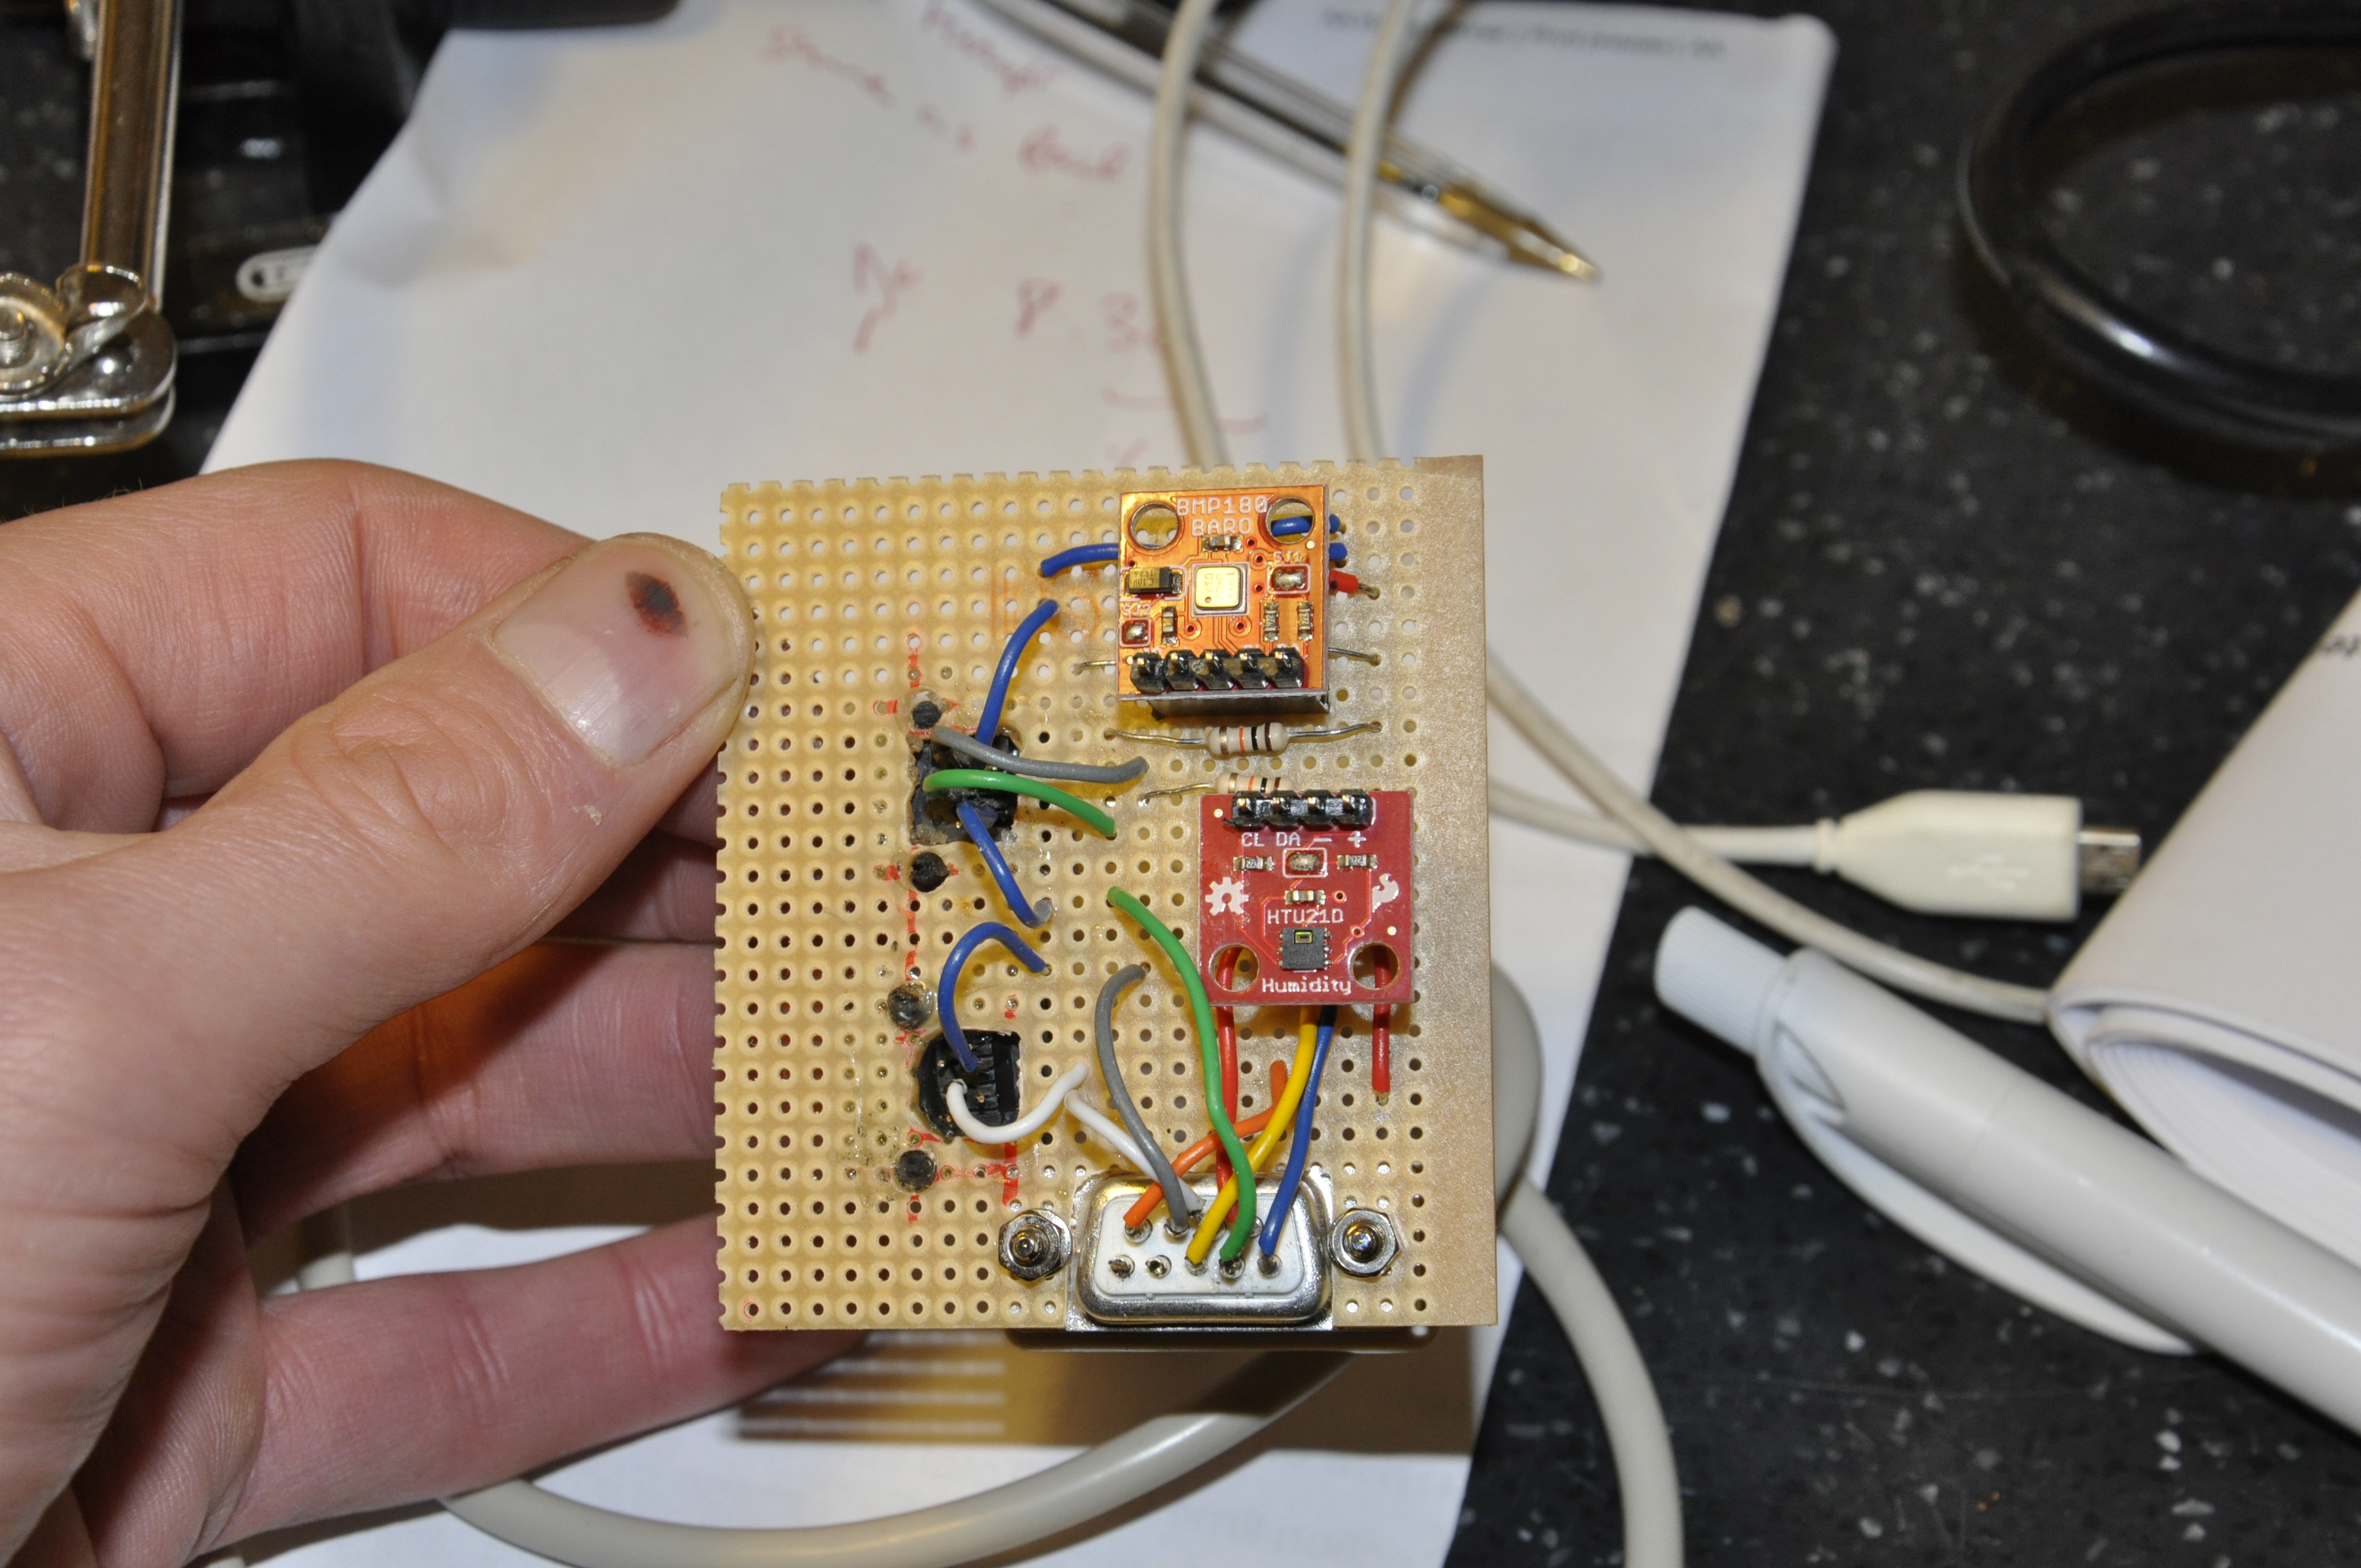 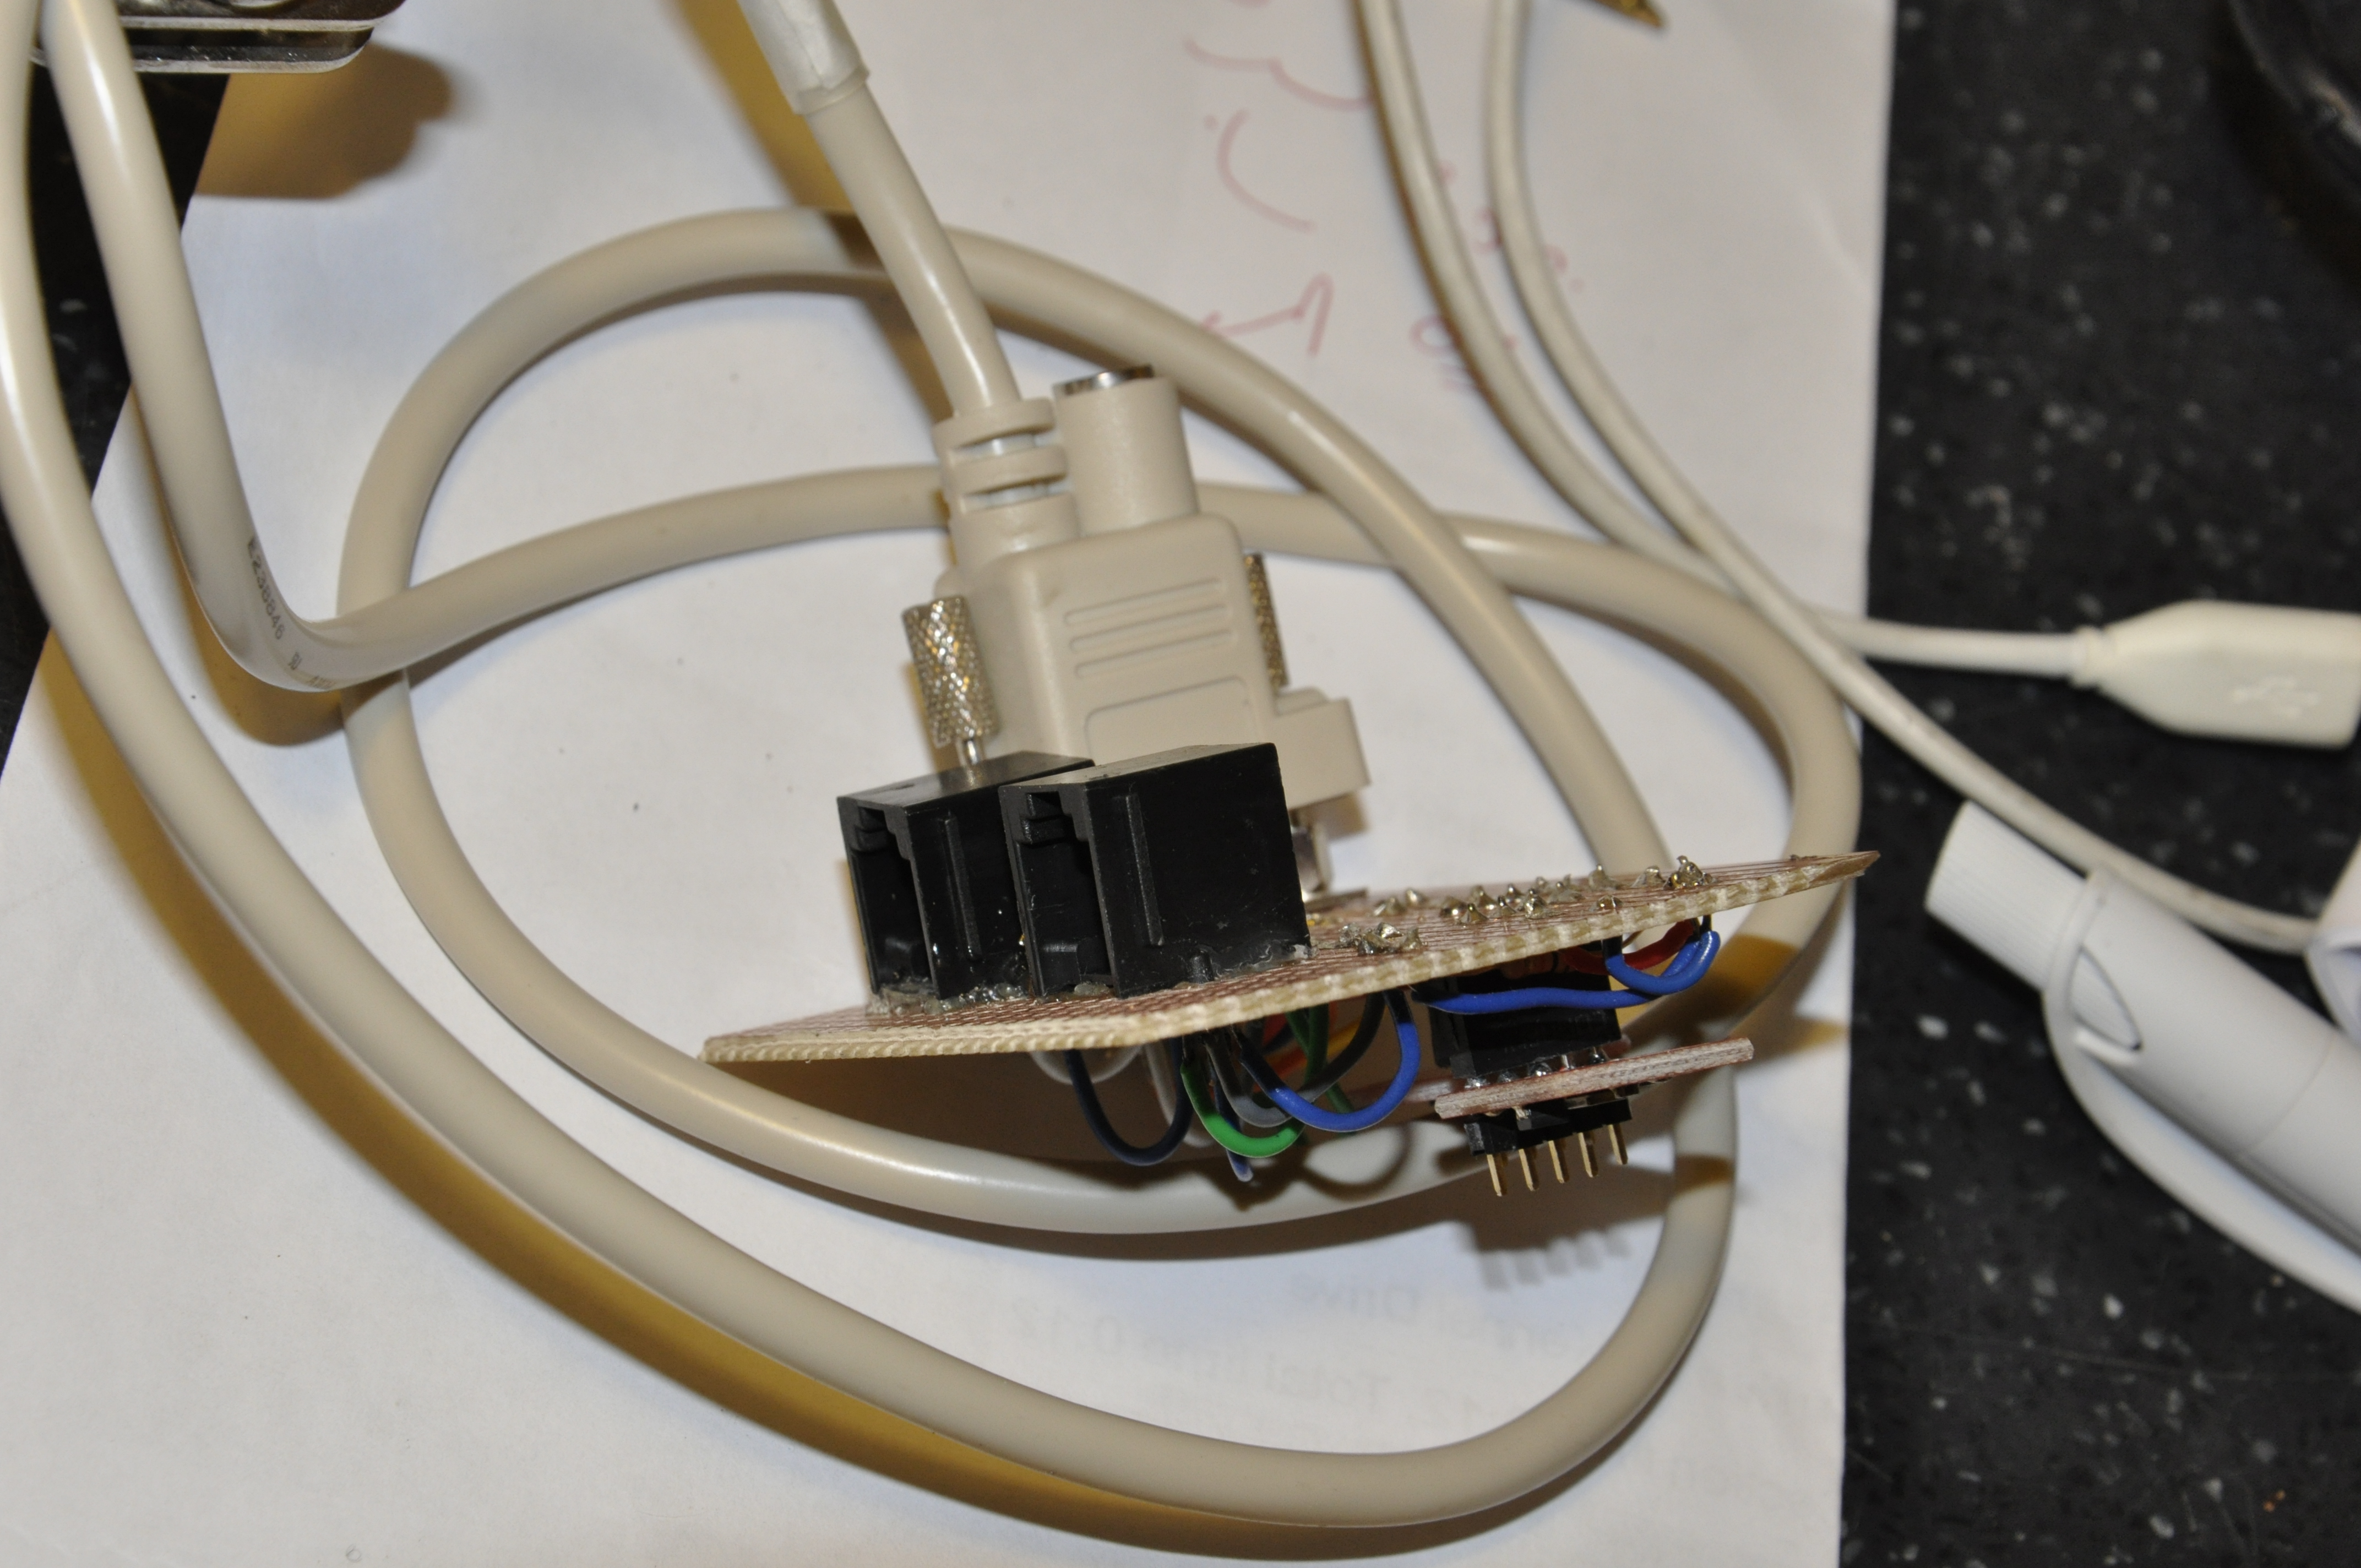 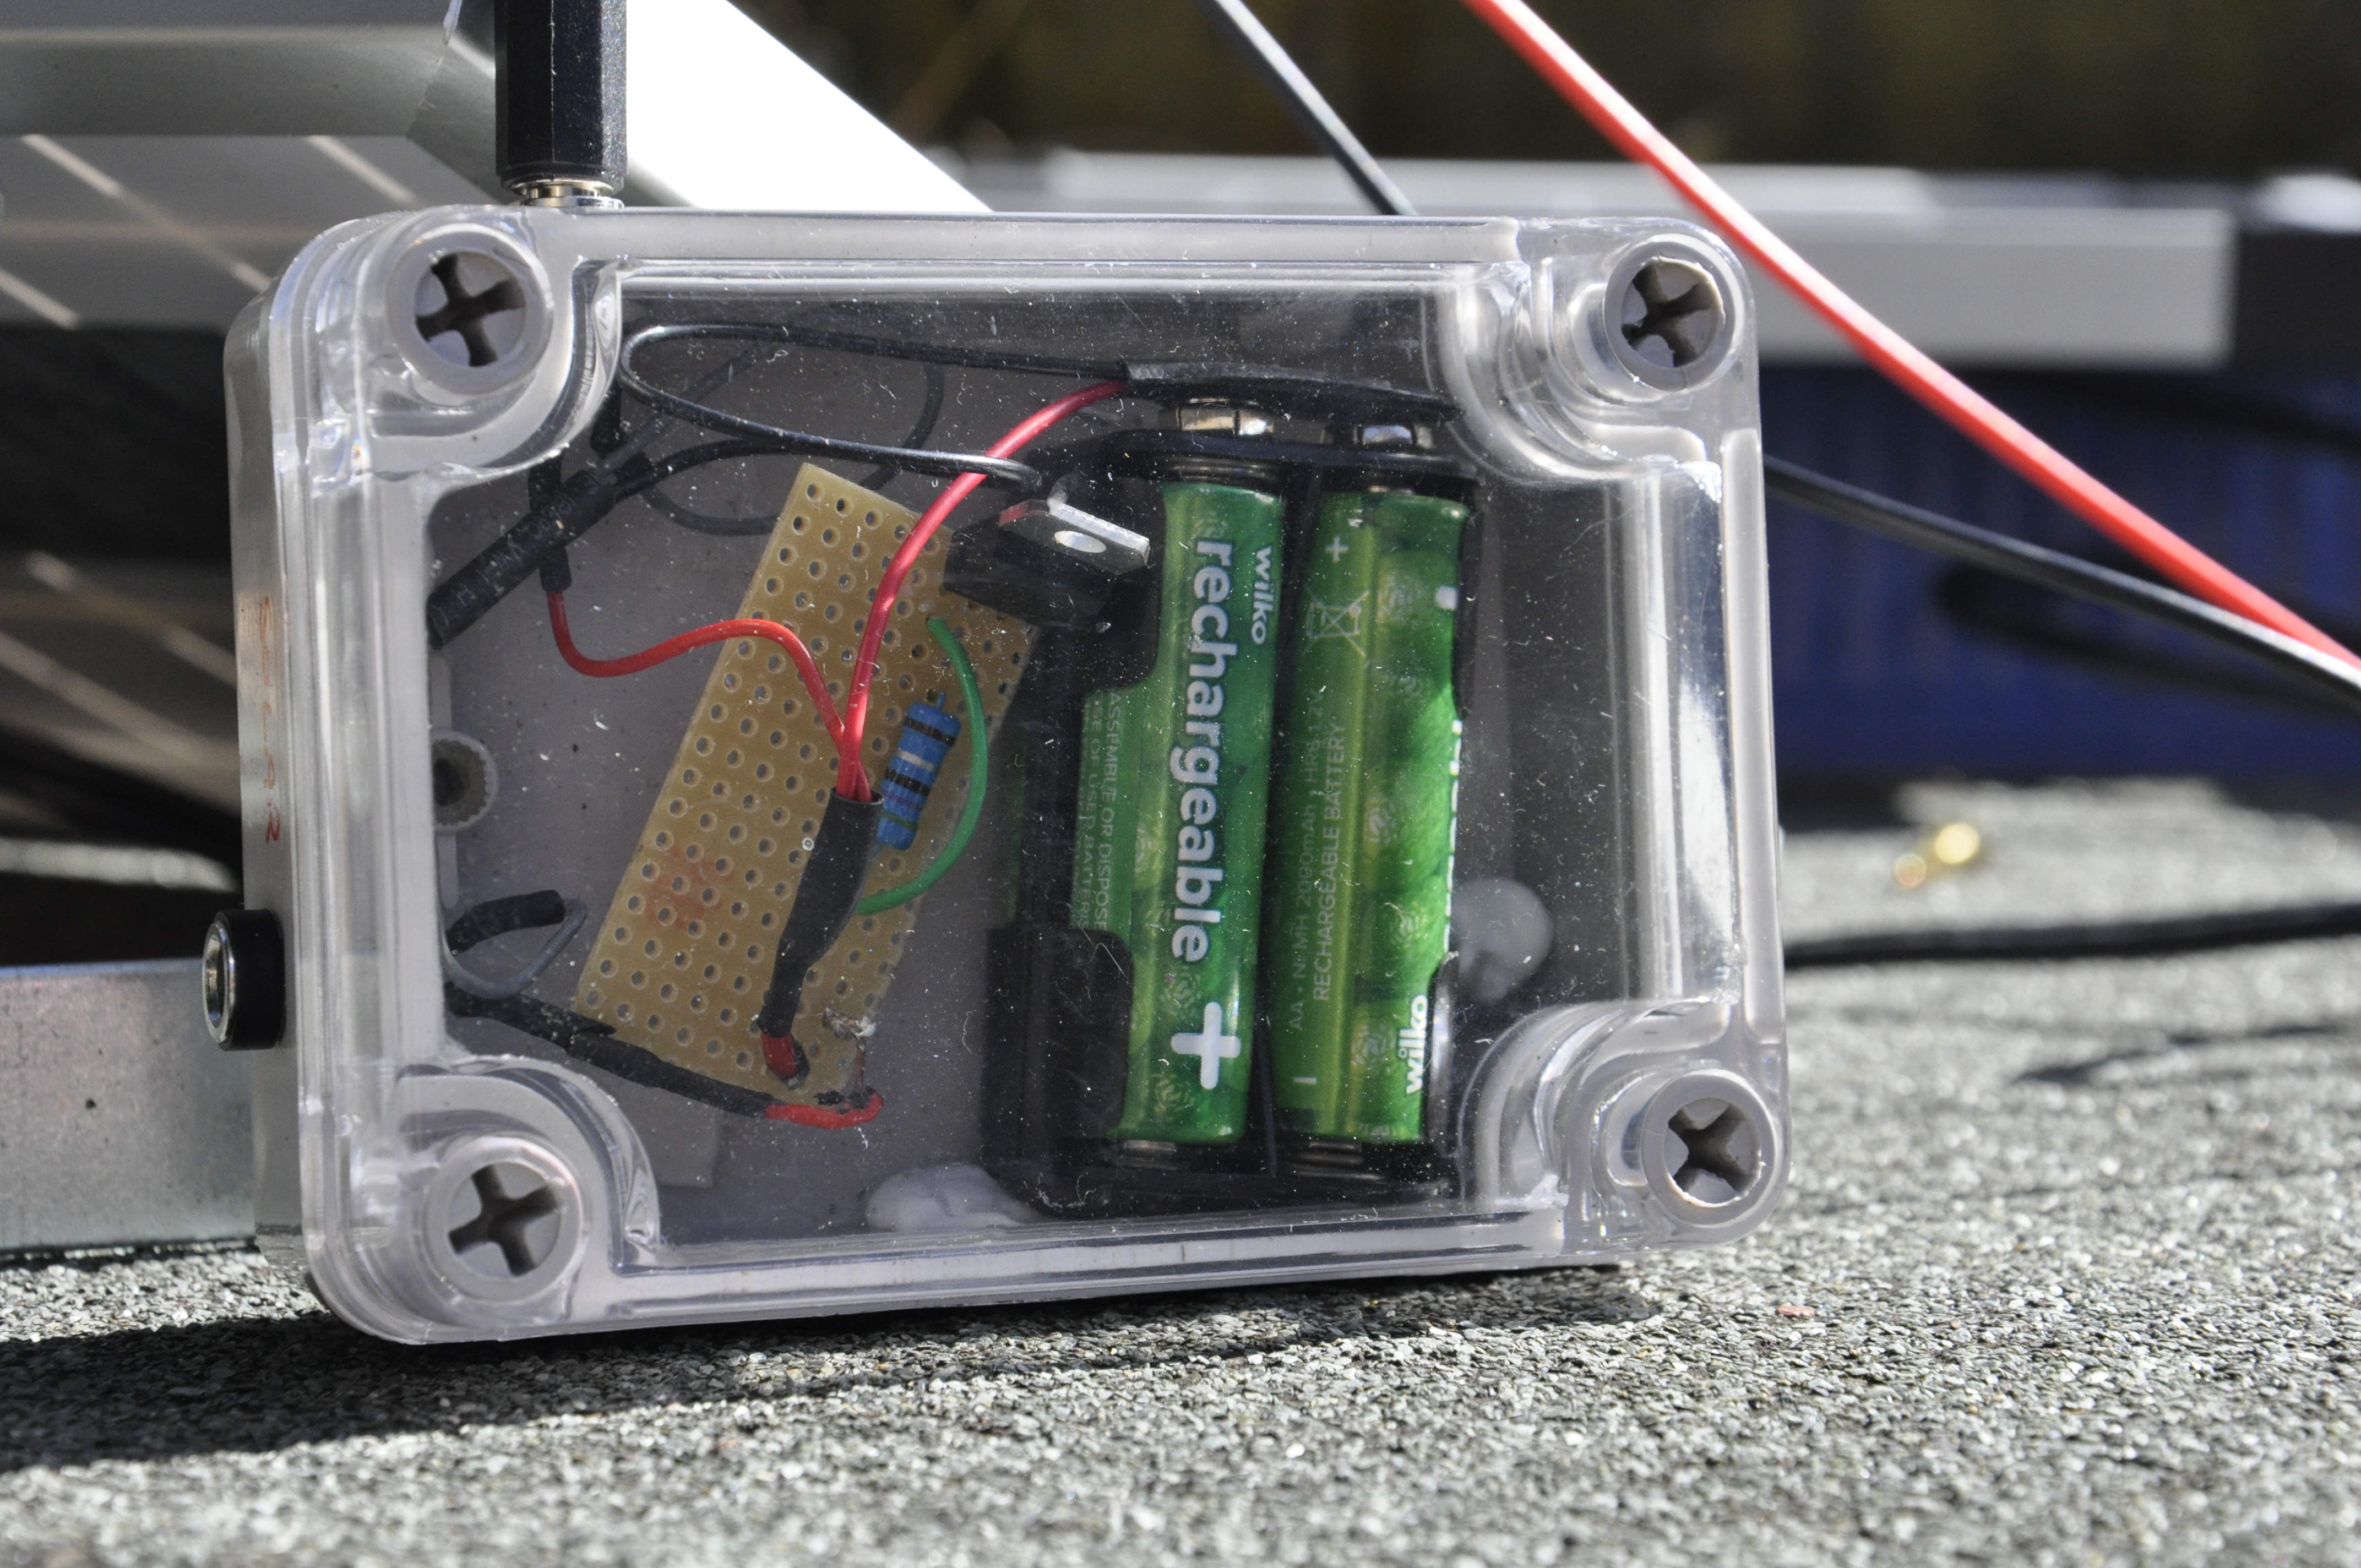 |
A few rethinks
 The Python code on the Pi is now running resiliently with some decent logging. There are enveloping shell scripts and running as daemons via init.d processes. A good example of how to do it is on this blog: http://blog.scphillips.com/2013/07/getting-a-python-script-to-run-in-the-background-as-a-service-on-boot/ My Python coding is slowly shaping up - I've even been getting to grip with objects. I will post something when I dare to show it. I also invested in a mini Stevenson Screen just to give me a bit of space and keep the gear protected. The next stage is to start passing events between the process which gets the data from the weather station and the display daemon - so there are no unnecessary screen refreshes when the data has not been updated. 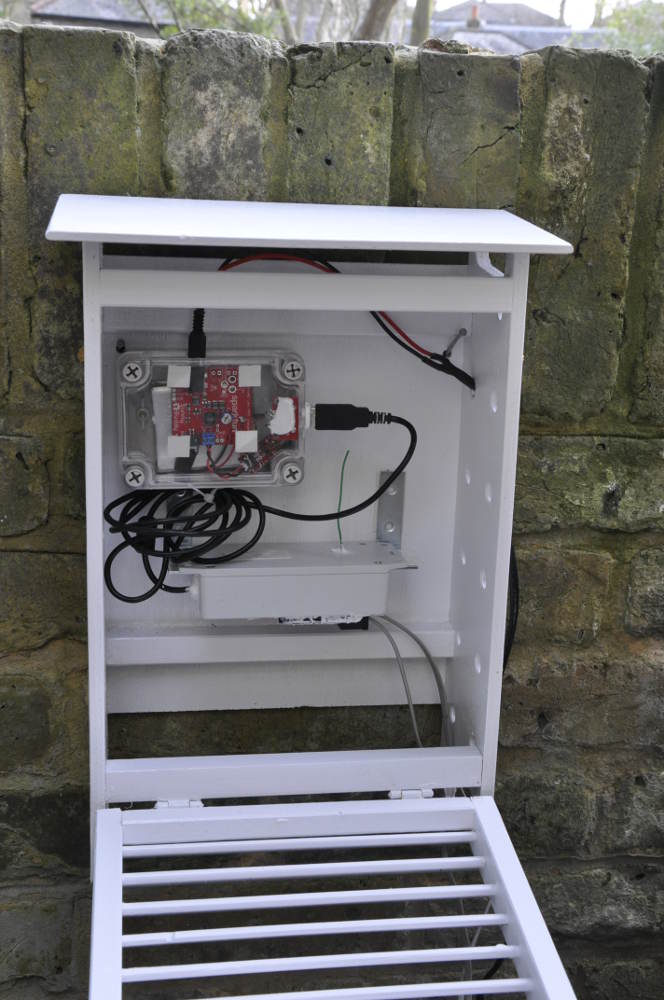 Without solar the setup runs for about 48 hours, with solar about 90. To drop the power usage, I've picked up a Ciseco RFu-328 which is aimed at low power applications. With a bit of recoding and some improvising I've made a breadboard prototype that runs of an AA battery. The plan in to produce something that will run off a basic solar setup and maybe 4 AA rechargables. That setup will also keep the costs down |
Arduino Pi weather station prototype up and running
 In hindsight I had an old cell in a battery trickle charger (for the car) that never really worked but could have done the trick here. 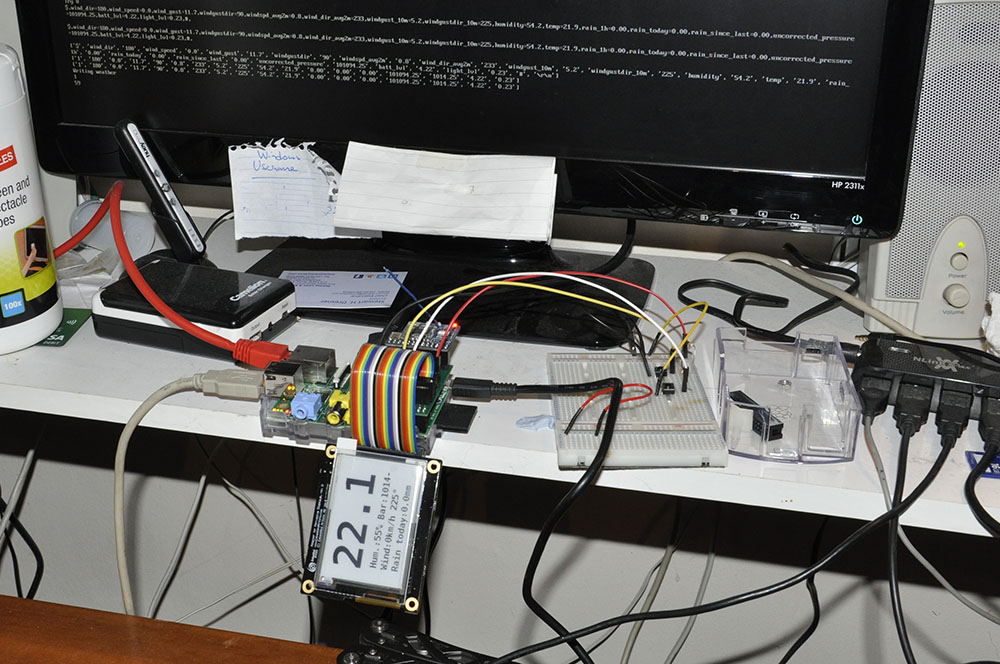 The Python code still needs a bit of work in terms of error trapping and logging. Plus I am adding some more virtual screens to be scrolled through via button presses (using that third free TriBorg header!). I've also ordered the final bits of hardware: a case for the display end, a power supply and a few cables. More on that later, but now I'll add those pics. |
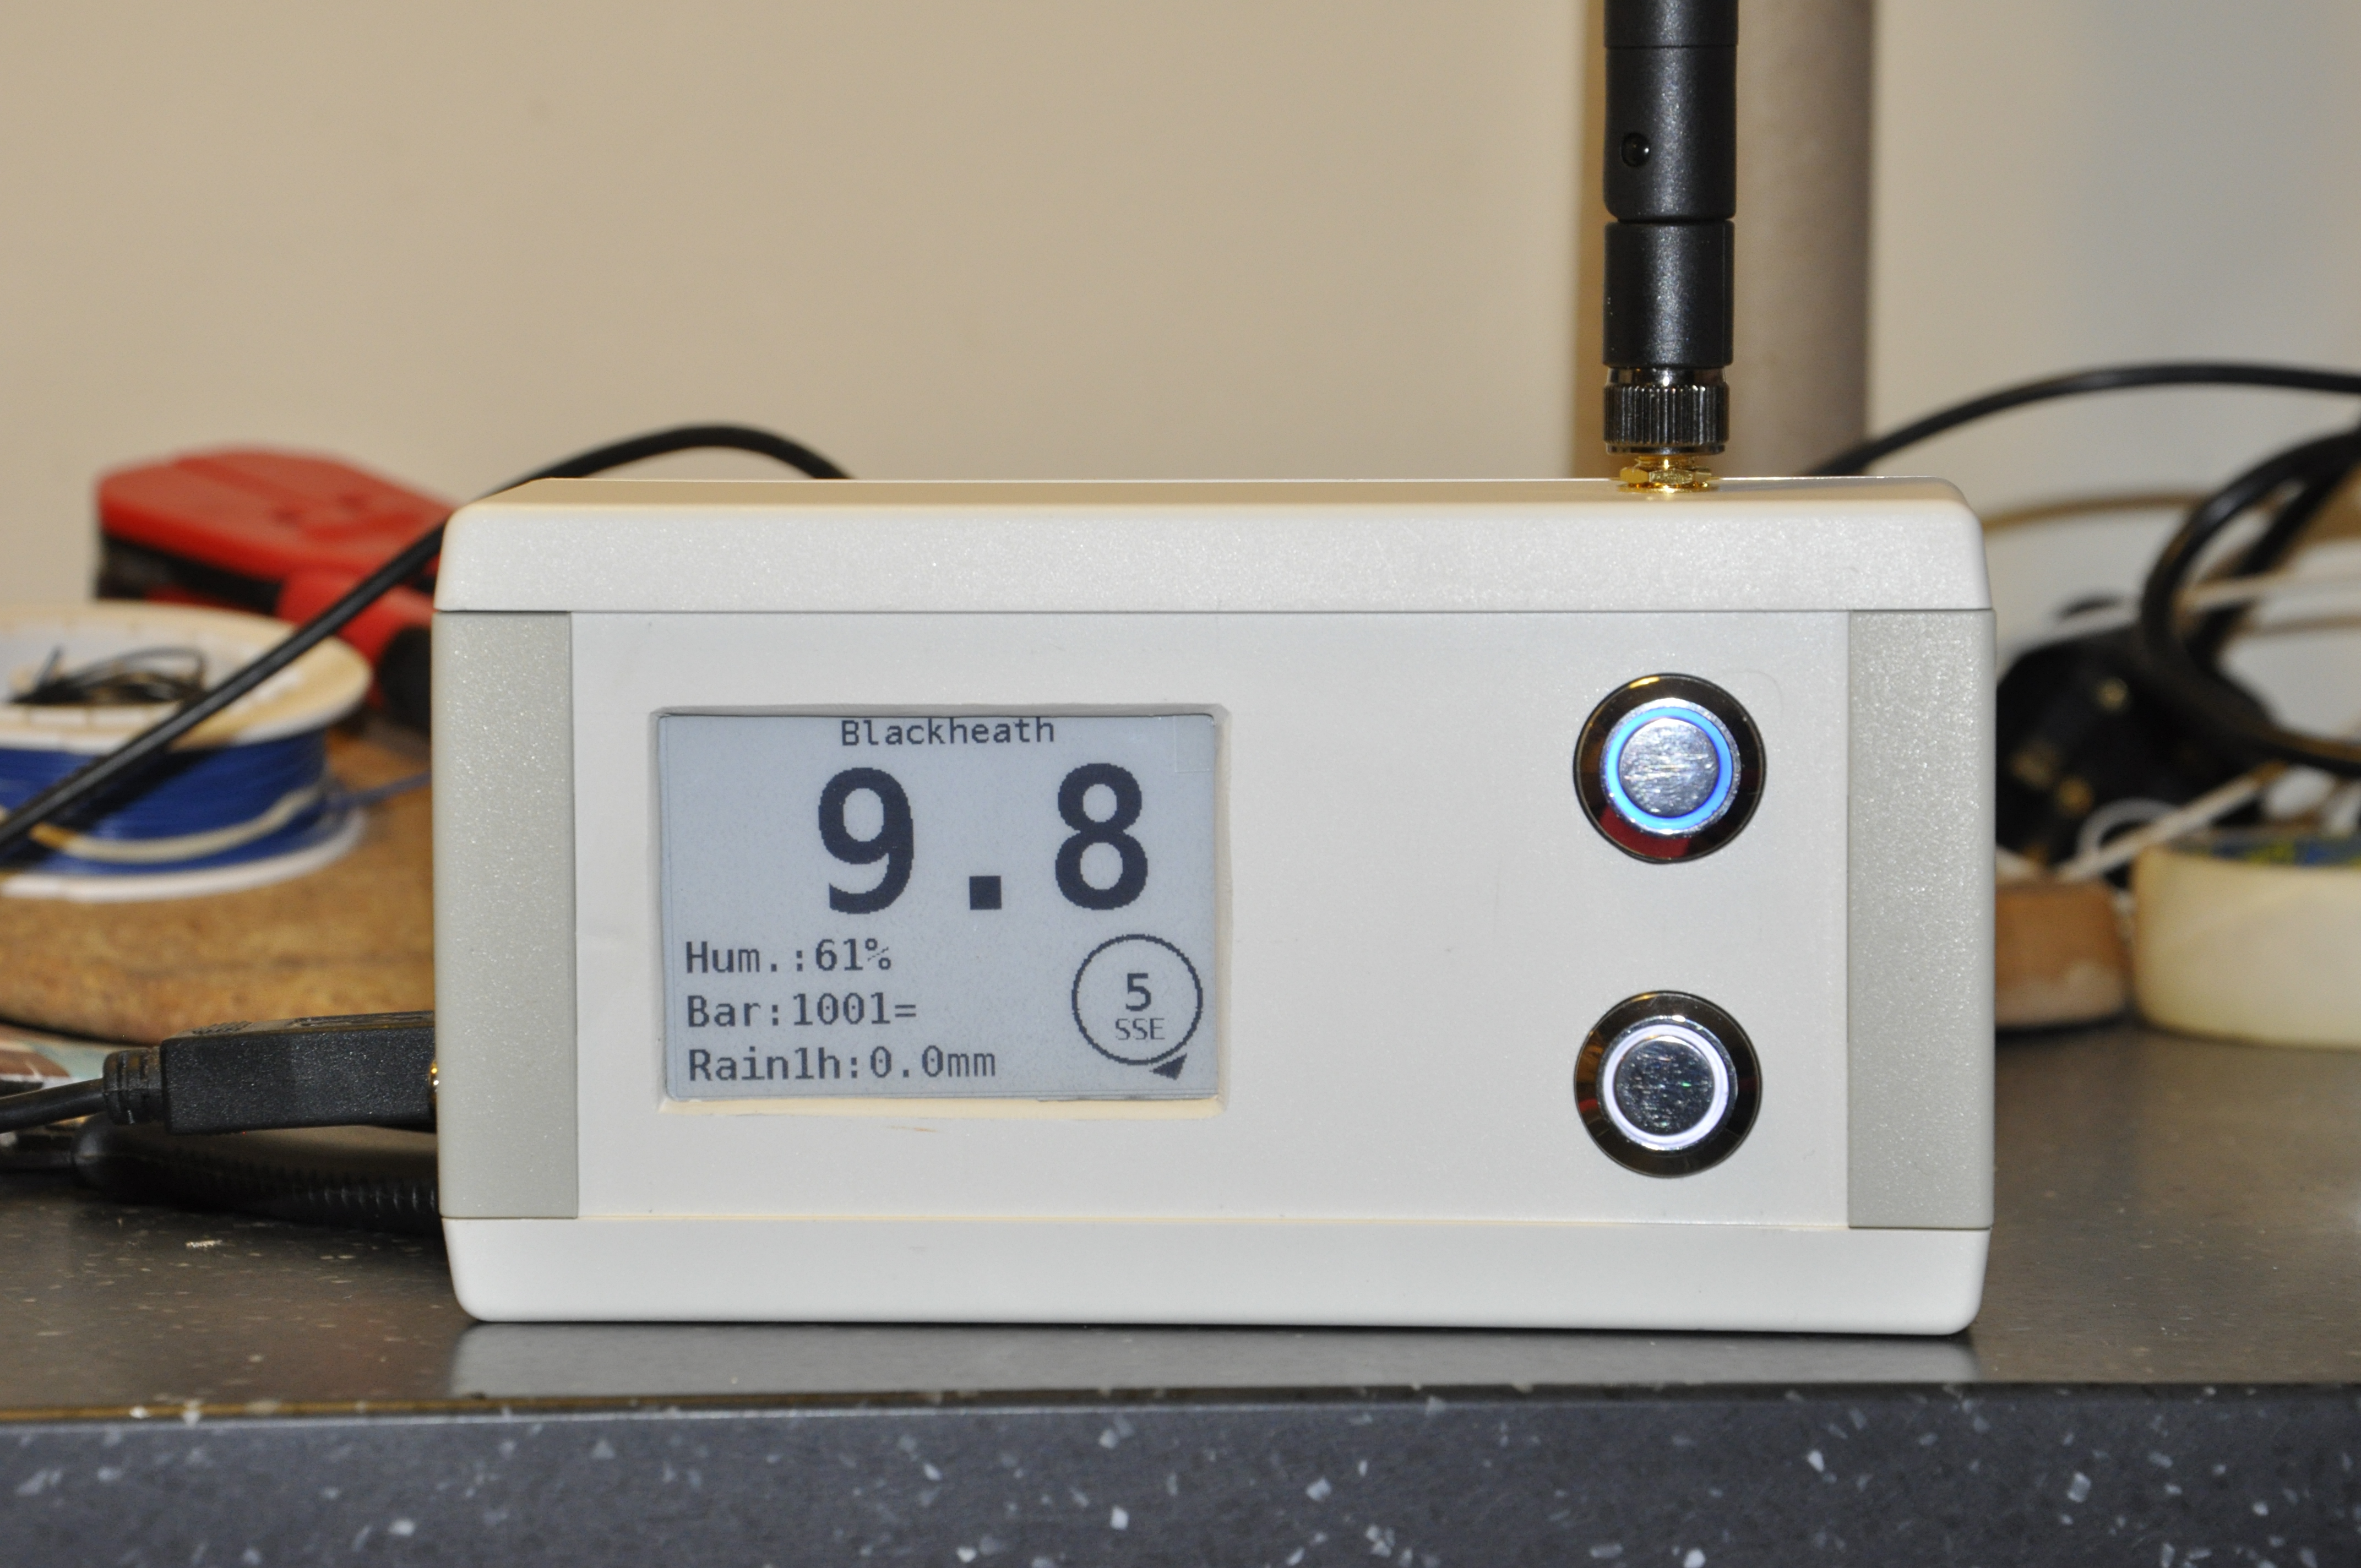
Arduino / Pi weather station - displaying progress
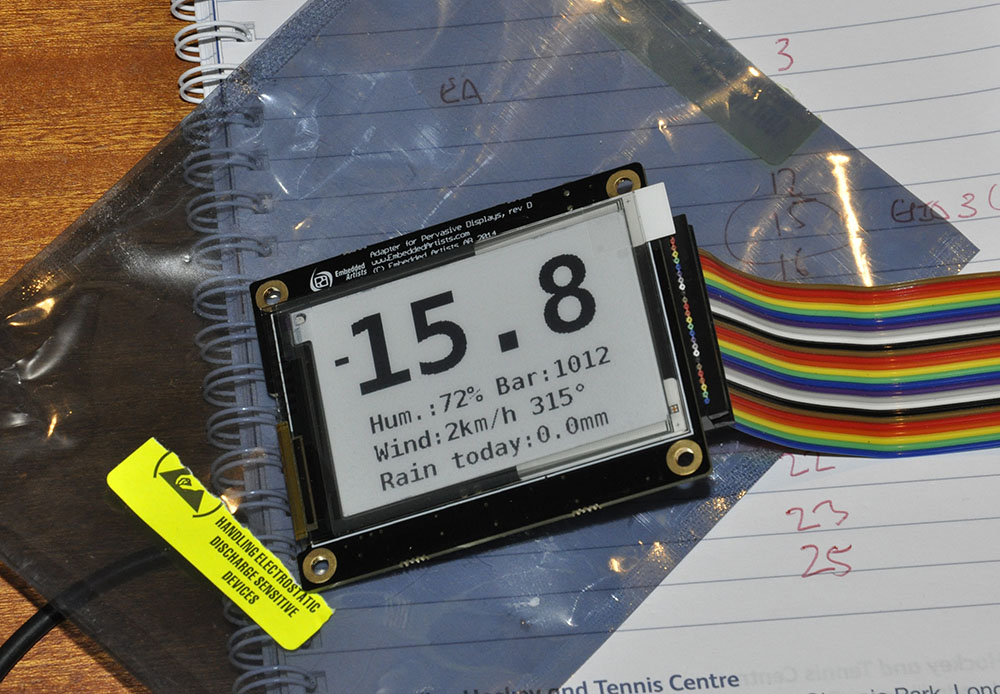 The only slight issue is there was a pin clash on the Pi between the EA display and the CISECO slice of radio. The radio, of course, uses the UART pins (8 and 10) for serial IO. The EA uses these too - just for general control. Fortunately someone has come across this before and there is a code variant in the GIT hub to cope with that. Just find epd_io_free_uart.h in gratis /PlatformWithOS/RaspberryPi. Swap that with the epd_io.h code before you compile. That stops the problem of the EPD Fuse service contending with the radio for pin eight ( think 8 was the issue as the radio was 'on' all the time). Funnily enough I didn't have to re-wire the pin connections to make things work. The latest version of the EA board plugs straight into the PI GPIO via the usual ribbon cable. The next stage is just to tidy up the code a bit and make it a bit more robust. I'll post up some code when the bugs are ironed out. |
Prototyping
   |
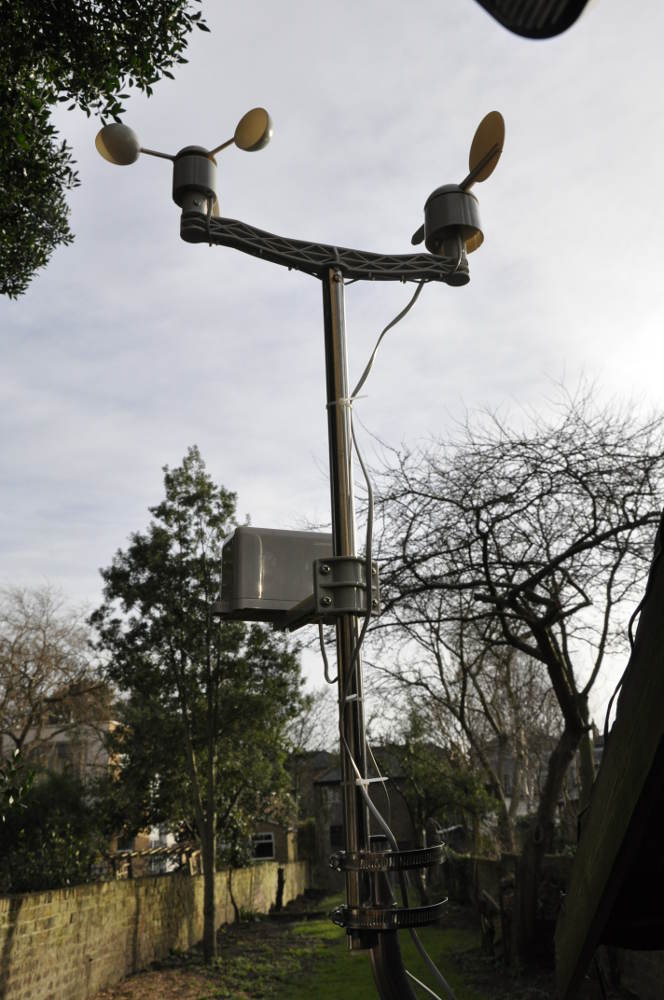
Arduino/Pi weather station - progress report
Assembling the SparkFun Weather Meters (rain, wind direction and speed) is a breeze – which is just as well as there are no instructions. The nuts and bolts for attaching them to the supplied pole were not supplied either – M3 bolts work well if you need them. I'd bought the SparkFun Weathershield for the Arduino, just to help me get started (don't worry this isn't an advertorial!). This proved pretty simple to fire up. Firstly I soldered a standard set of Arduino headers on the board followed by a couple of RJ11 sockets for the cables from the weather sensors. There is a demo sketch on the Weathersheld product page works ok with the XinoRF board I have decided to use on the weather end of the operation. The only issue is that the sketch uses pin 8 (well it declares it but never uses it for a status LED). So it's worth commenting that declaration out. Similarly the Weather Shield has an LED wired to pin 8. This is the pin used by the XinoRF to switch on the radio. You can leave it wired up if you want. But I cut off pin 8 on the Weathershield header and jumped over pin 12 so I can light that green LED if I ever need to. It's worth running the demo sketch initially just to verify everything is working OK via the serial monitor on the Arduino IDE interface. After that you can try firing up the radio by adding the following to the sketch to toggle on the radio:
pinMode(8, OUTPUT);
digitalWrite(8, HIGH);
Serial.begin(115200);
Then it's time to get the other side of the interface working on the Raspberry Pi. |
Shopping for my Arduino/Pi weather station
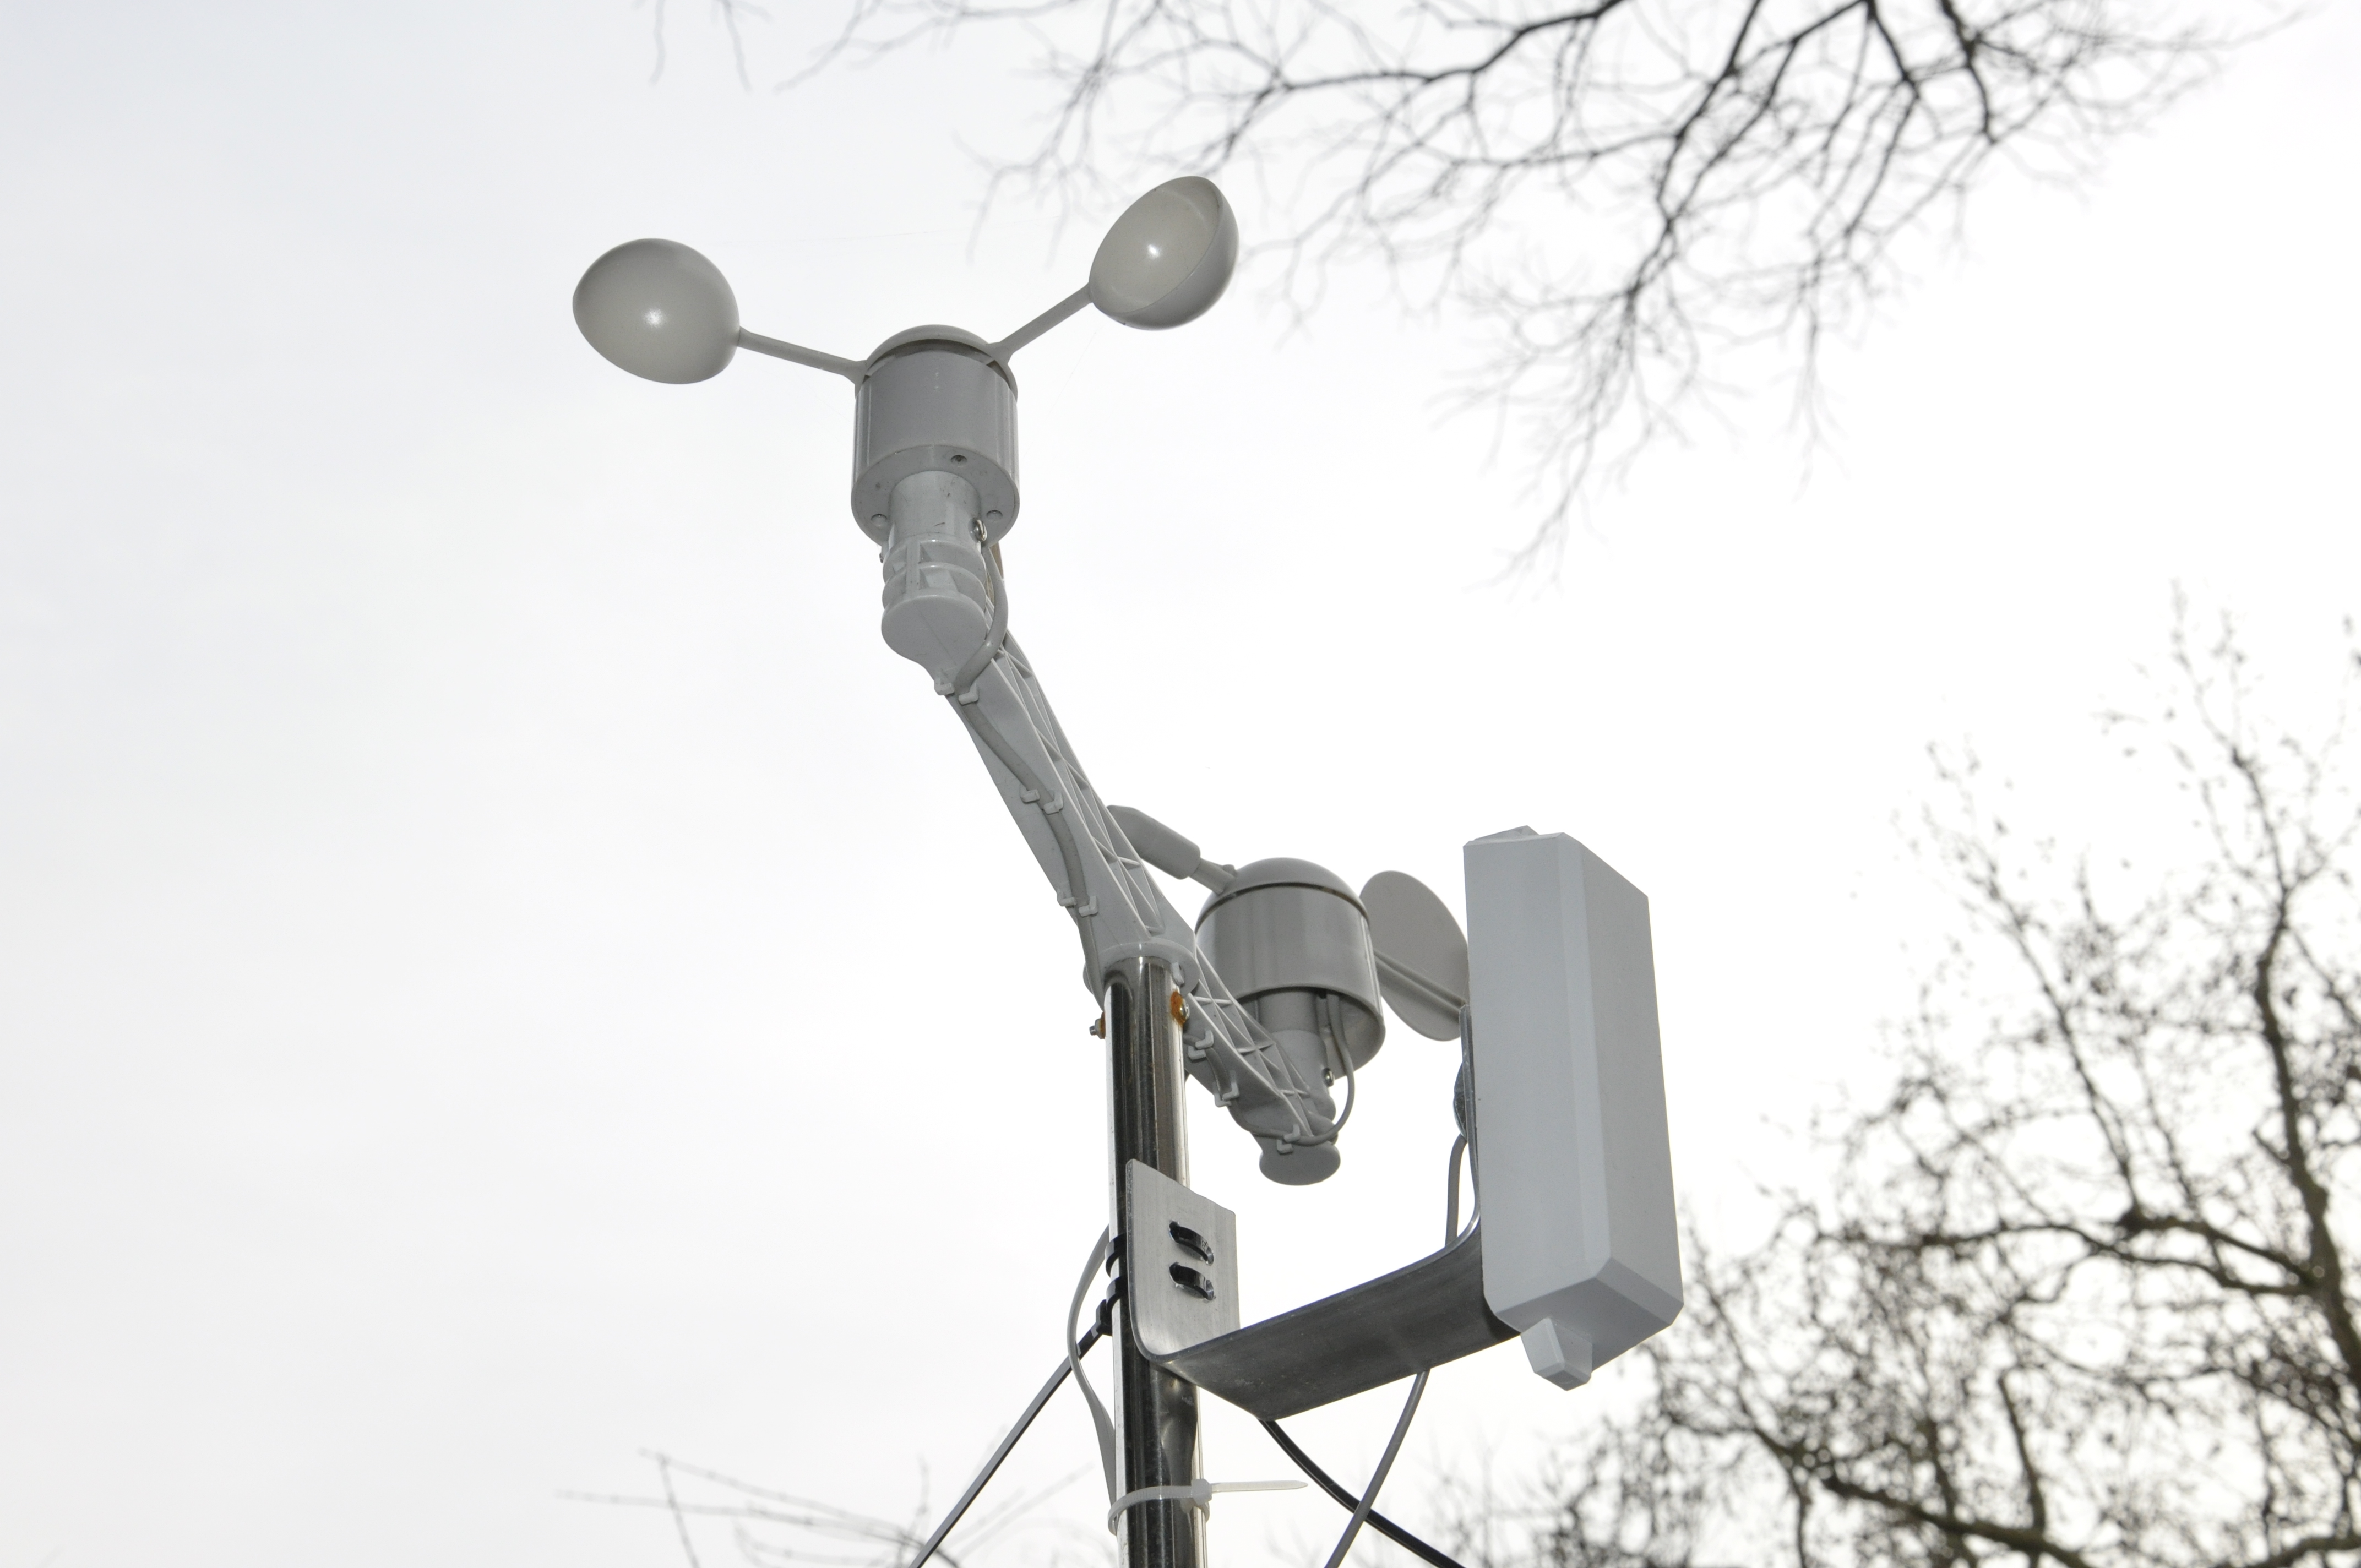
With some basic plans in my head (and some written down below), I have been hitting the internet looking for suitable components. The inspiration from this project from Sparkfun can be seen in some of my choices. Here is what I have acquired so far: For the weather station head
For the solar power
On top of that all I need is a handful of connectors and I'll power up the soldering iron and get going. |
1-10 of 12