 I advise getting the software working with a Pi just using headphones and a monitor/keyboard, just so you know that side of things is operational, before moving on to do some wiring.Here are some general notes about my project which might help you with your radio. HardwareThe model B raspberry Pi will work as an IP radio through headphones a TV (via the HDMI interface) or to PC-style speakers through the audio-out socket. Add a USB wireless dongle and you have a 'wireless' to use the old-style lingo. To make something more like a standalone unit you will need a power supply, an amplifier (with possibly another power supply) and a speaker or speakers along with some sort of display and some switches.For the power I used a taken-to-pieces USB power supply to power the Pi, a transformer and Maplin K18231A power supply kit linked to a 15V mains transformer. Of course this means you will have to do some mains wiring - if you are unhappy with this you can buy complete power supplies, but I was keen to get my Bush radio powered just through the figure-of-eight mains socket on the back. I had hoped to use the transformer already in the radio - but it was broken (and why the radio wasn't working). I did use the existing speaker - a 8W 4 Ohm one which matched up well with the amplifier kit I used - a Maplin K4001 7W amplifier. Make sure you use screened audio cable between the Pi and the amplifier. I was working in mono so I just wired up one channel from a stereo jack plug, plugged into the Pi. I amended the MPD (music player daemon) configuration to make the output mono by changing the configuration file. Other extras I needed were a 10k preset potentiometer to set the voltage for the contrast on the LCD display (pin 3). Without this the display was too dark in my setup. If you can work out the other wiring, that should be a fairly simple task for you. Similarly I used a 47k linear pot to adjust the input to the amplifier until the sound quality was decent. There are instructions for this in the Maplin amplifier kit.As suggested by Bob, I used a Slice of Pi to do the necessary wiring of the LCD and switches. It is a really tight fit and this is going to be the bit of the project that will take most time and is most likely to cause faults. If I was making the project again, I might use a larger circuit board for the wiring. SoftwareThe Bob Rathbone installation will get you going. Then, depending on your Python skills, you can make a few amendments to personalise your radio. I found that installing Telnet (sudo apt-get install telnetd) was the easiest way to interface with the radio. Once I'd configured the USB wireless dongle, I stopped using the ethernet socket, having configured my wireless router to give the unit a fixed IP address. As I said above, it's easiest to get all this working before you start construction. Construction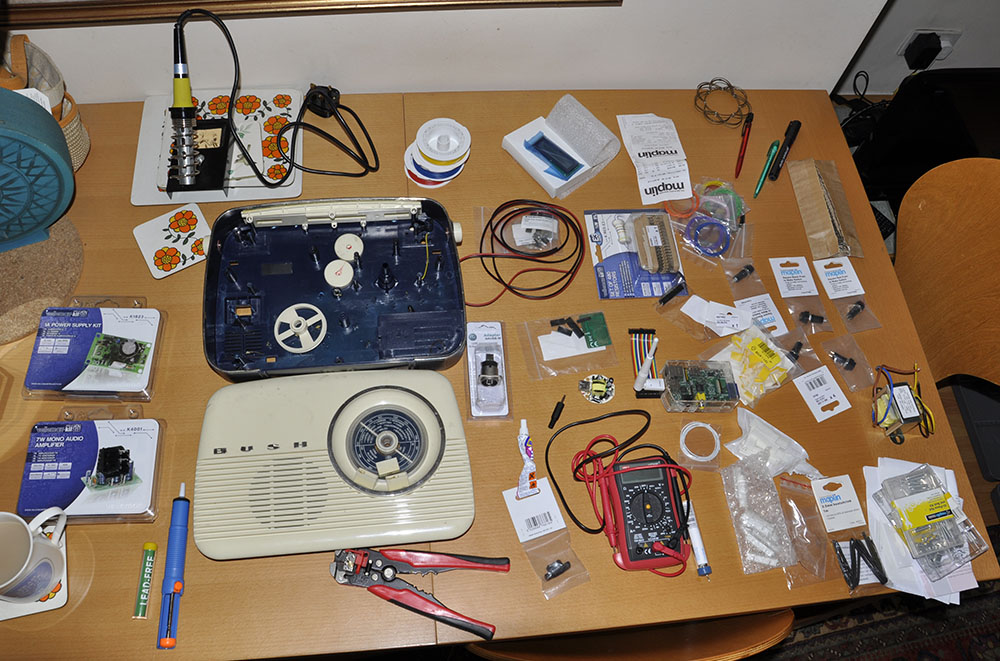 The second is of the first stage of construction with the transformer, USB power supply and a few switches mounted. The transformer is on the reverse side of the picture in what used to be the 9v battery space.The live wiring is insulated later on! 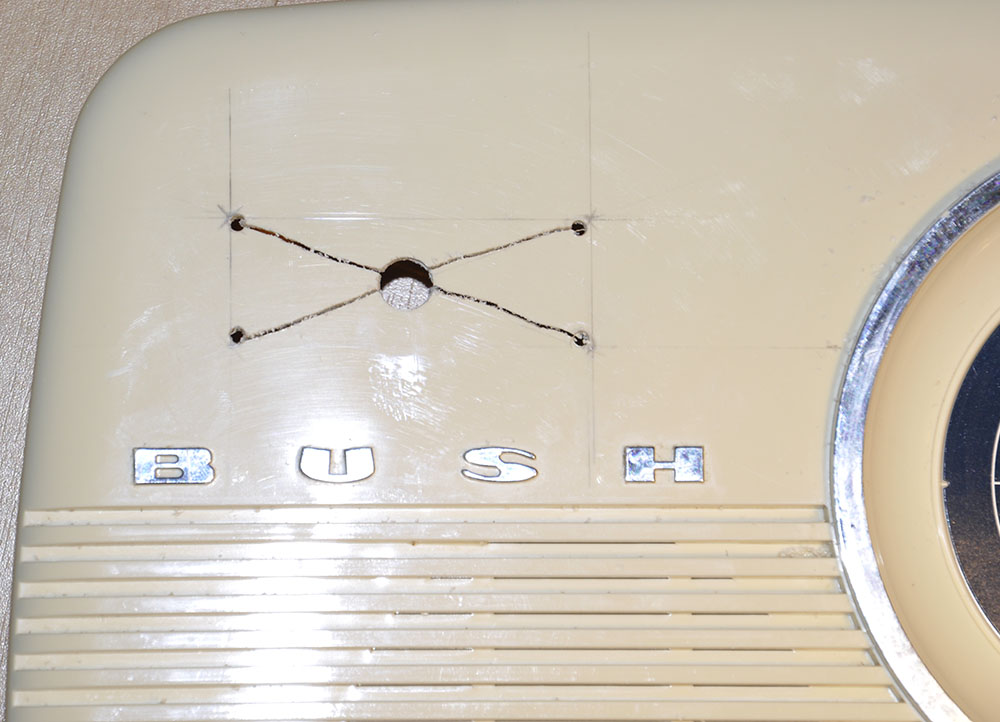 Next stage was to use a fretsaw to cut from the centre to each corner - so far pretty easy. The next part requires super-care. Use a steel ruler and a knife or scalpel (I used a 'Stanley' knife) to cut repeatedly along each side of the front side of the cutout. If you go from the holes inwards you are less likely to overcut. Sticky taping the ruler to the radio held stops slips. When the cut is about 1/3 of the way through, you can snap off the triangular sections with a neat finish. Do this for each of the four triangles and make any final trims with a flat-bladed wood file. I am not the neatest craftsperson in the world, but I am pretty proud of the finished result - but it did take time and care. 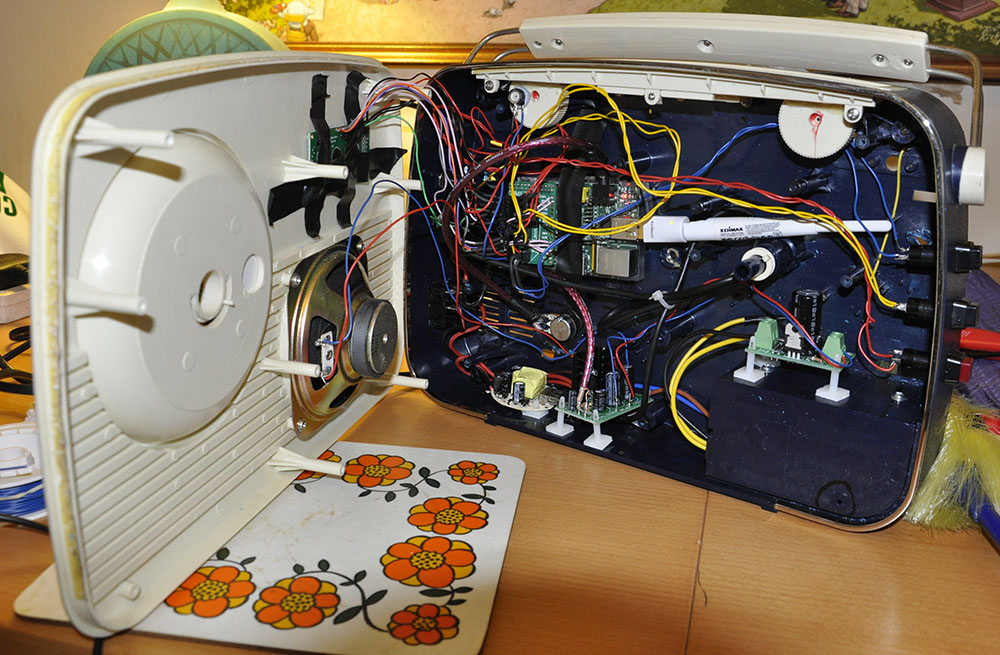 The power supply for the amplifier is mounted on the right, above the battery box holding the transformer. The USB power supply, for the Pi, and the audio amplifier are mounted on the bottom of the case. The Pi with the Slice of Pi on top, is in the centre-left with the Edimax wireless dongle's antenna clearly visible (it was just what I had not being used - smaller units are available). You can see the extra potentiomenters - for the LCD (glued onto the wheel top left) and the audio level (just above the amplifier and mounted through the back of the case.) I ended up gluing all the original switches and dials in place as there was nothing to mount them too with the original circuit-board removed. A more imaginative build could have included the original switches and dials into the design. PlaylistsBob Rathbone includes some 'playlist' files for the radio. And there are stacks of Internet stations out there. The BBC has, however, its own peculiar way of doing things. The BBC playlists are 'tokenised' (as far as I understand) and you need to get to the real, underlying playlist address. You need a script to do this and to build it in to your start up routines for the radio. This is easier than it might sound - just follow the instructions for getting the radio to load when the power comes on. If you don't know much about scripts and executables in Unix - it is a good chance to learn! Here is my script, gleaned from various sources on the Internet: #!/bin/bash set -e playlistdir=/var/lib/mpd/playlists declare -A radios radios["BBC Radio 1"]="http://www.bbc.co.uk/radio/listen/live/r1_aaclca.pls" radios["BBC Radio 1Xtra"]="http://www.bbc.co.uk/radio/listen/live/r1x_aaclca.pls" radios["BBC Radio 2"]="http://www.bbc.co.uk/radio/listen/live/r2_aaclca.pls" radios["BBC Radio 3"]="http://www.bbc.co.uk/radio/listen/live/r3_aaclca.pls" radios["BBC Radio 4"]="http://www.bbc.co.uk/radio/listen/live/r4_aaclca.pls" radios["BBC Radio 4LW"]="http://www.bbc.co.uk/radio/listen/live/r4lw_aaclca.pls" radios["BBC Radio 4 Extra"]="http://www.bbc.co.uk/radio/listen/live/r4x_aaclca.pls" radios["BBC Radio 5 Live"]="http://www.bbc.co.uk/radio/listen/live/r5l_aaclca.pls" radios["BBC Radio 5 Live Sports Extra"]="http://www.bbc.co.uk/radio/listen/live/r5lsp_aaclca.pls" radios["BBC Radio 6 Music"]="http://www.bbc.co.uk/radio/listen/live/r6_aaclca.pls" radios["BBC Radio Asian Network"]="http://www.bbc.co.uk/radio/listen/live/ran_aaclca.pls" radios["BBC Radio London"]="http://bbc.co.uk/radio/listen/live/bbclondon.asx" radios["BBC Radio Derby"]="http://bbc.co.uk/radio/listen/live/bbcderby.asx" for k in "${!radios[@]}" do filepath="${playlistdir}/${k}.m3u" rm -f "$filepath" echo "#EXTM3U" >> "$filepath" pls=${radios[$k]} echo "#EXTINF:-1, BBC - $k" >> "$filepath" curl -s $pls | grep File1 | sed 's/File1=\(.*\)/\1/' >> "$filepath" done |
Projects >